Introduction
- This help is for application users,
i.e., marshals and competitors.
Help for organizers is on the application web page https://ant.yq.cz.
- ANT can run in several modes:
- Race supervising
(results files management, preliminary result calculation,
ToePunch system chip readout,
presentation of the startlist for competitors, etc.).
- Timed control answer recording
and time keeping by a marshal.
- Timed control answer selection
and time keeping by a competitor.
- Punching classic course (PreO) answers
by a competitor on a device
carried by them (mobile e-card mode).
- Race supervising
(results files management, preliminary result calculation,
ToePunch system chip readout,
presentation of the startlist for competitors, etc.).
- The application must be configured
for a race.
- If you just want to test the application,
press the Sample button on the initial screen
and select an appropriate sample.
ANT will configure himself,
a basic screen will appear based on the selected sample,
and the application will be ready for testing.
- If you have a configuration from the organizer,
press the Race button on the initial screen,
select the resource where the configuration is stored
(typically one of web servers ant.yq.cz, top.yq.cz, or preoresultat.se),
choose the right race,
and ANT will download the configuration.
If you are a timed control marshal, you will then see
the Stations button on your main screen,
which you should use to activate the station(s) you will be working at
(see Stations and Courses Configuration chapter).
- If you want to use a previously downloaded configuration,
choose Saved configuration source,
then find the configuration by race name.
- If you want to use a configuration
transferred to the smartphone/tablet as a file,
you can find it on the local filesystem.
- If you want to test your own configuration,
you will have to visit more menu items, including
Preferences, Race, Stations, Courses,
and maybe Startlist and Maps
(see the corresponding help topics).
- If you just want to test the application,
press the Sample button on the initial screen
and select an appropriate sample.
ANT will configure himself,
a basic screen will appear based on the selected sample,
and the application will be ready for testing.
- When your configuration is complete,
an initial page appears.
- If you are a marshal at a timed control,
the initial page is a competitor selection screen
(see Selecting Competitors chapter).
You can select a competitor and start the procedure
(see Marshal at a Timed Control chapter).
- If you are a competitor using ANT
as a mobile e-card,
the initial page is a competitor selection screen
(see Selecting Competitors chapter).
You can select yourself and start your race
(see Punching on a mobile card chapter).
- If you are a marshal
using ANT in race supervisor mode,
the initial page displays a set of buttons
for invoking operations that, in our opinion,
you will need most often.
- If you are a marshal at a timed control,
the initial page is a competitor selection screen
(see Selecting Competitors chapter).
You can select a competitor and start the procedure
(see Marshal at a Timed Control chapter).
- Before the competition, charge your phone/tablet fully and cut your fingernails. :-) Or keep in mind that you can use your fingertips instead.
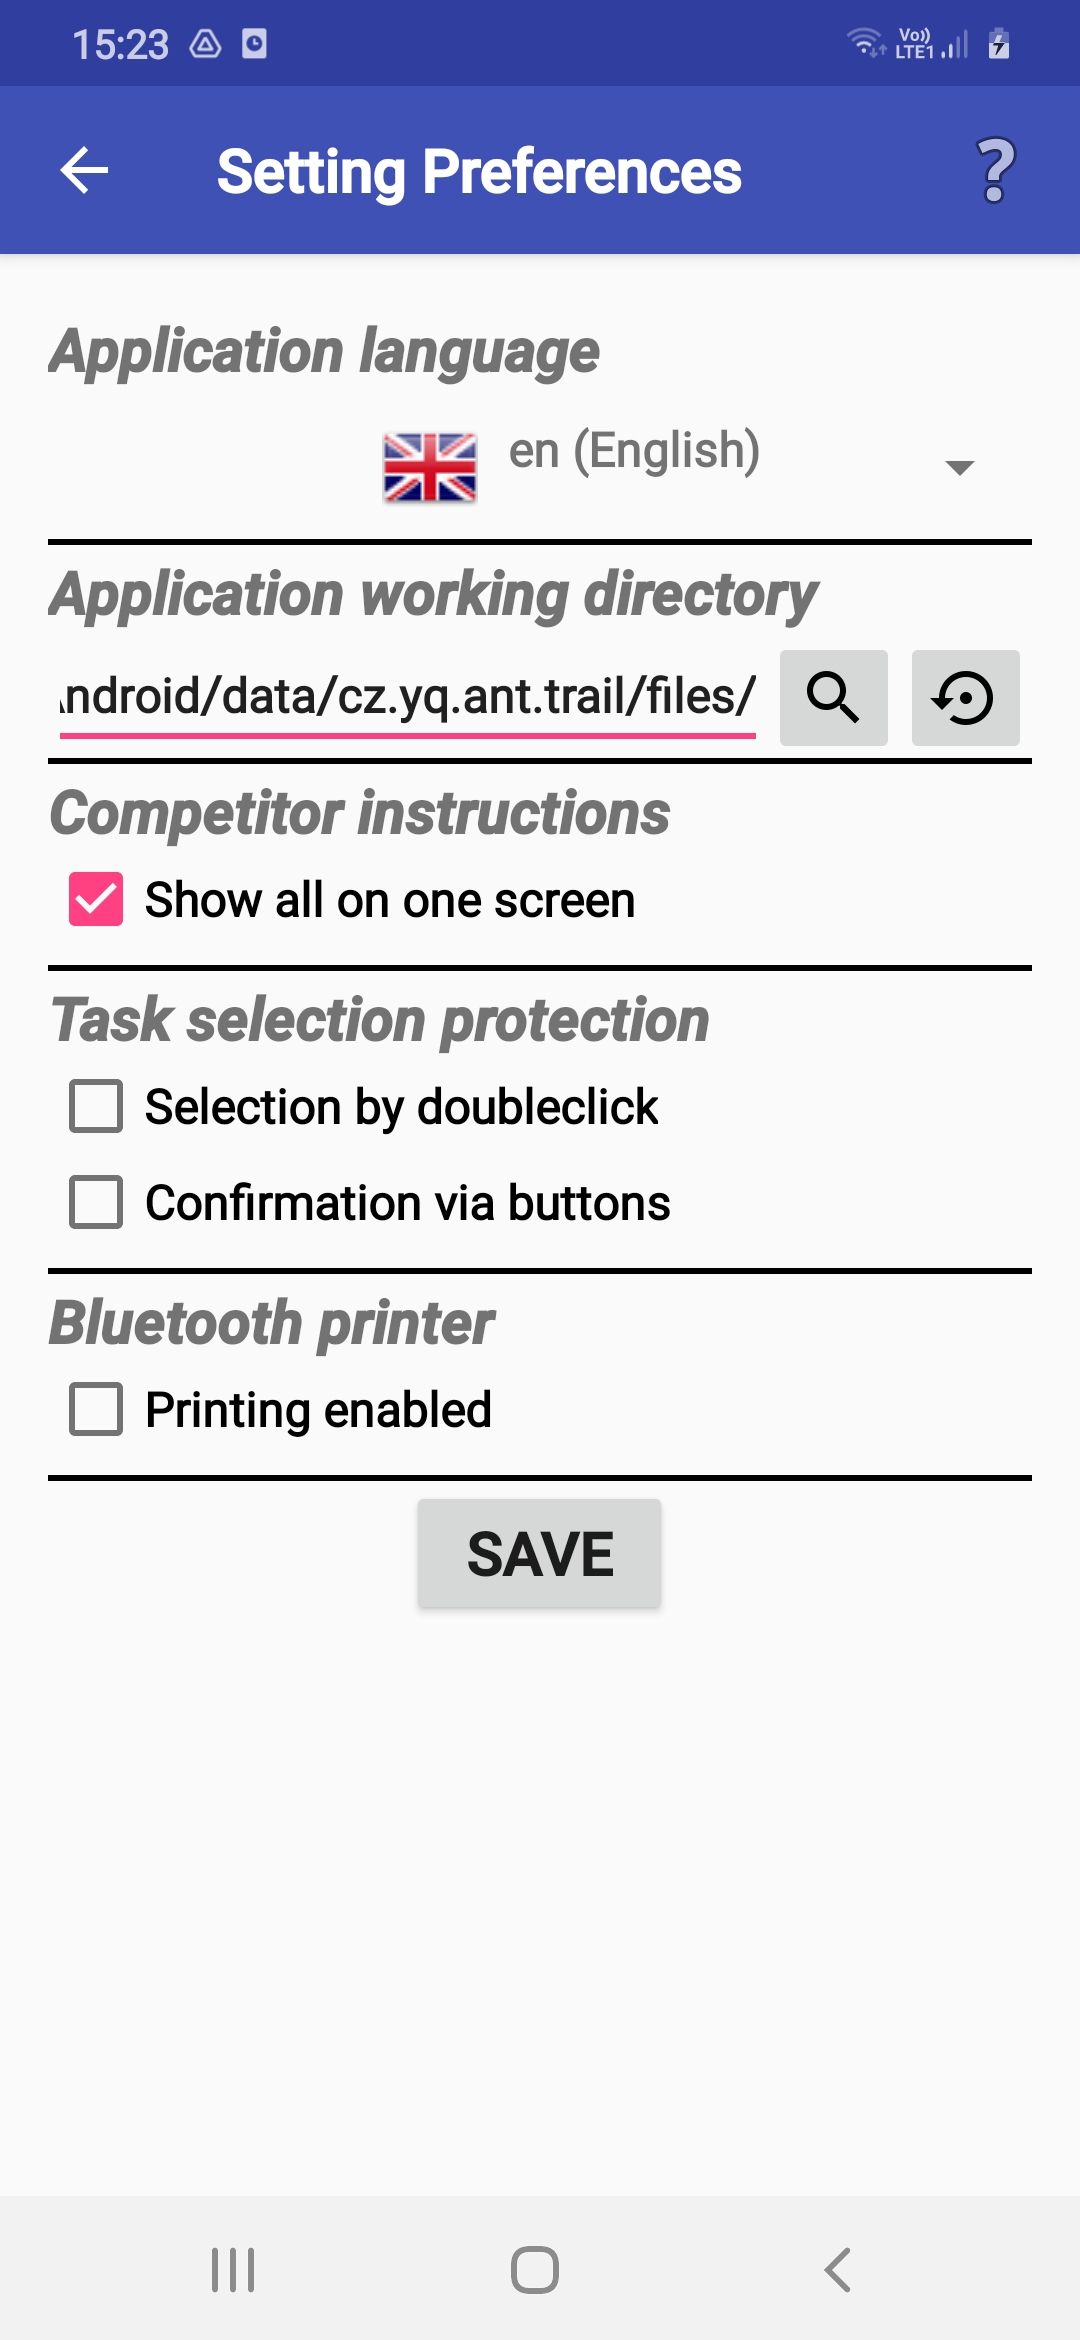
Setting Preferences
- The Preferences menu item
lets you adjust the app's functions
and behavior to your preferences.
- If you don't like using your phone/tablet's
default language, or this language is not supported,
you can choose one of the supported languages.
- ANT needs a working directory to be set.
Normally, ANT chooses it by himself,
but sometimes a publicly accessible directory must be set manually.
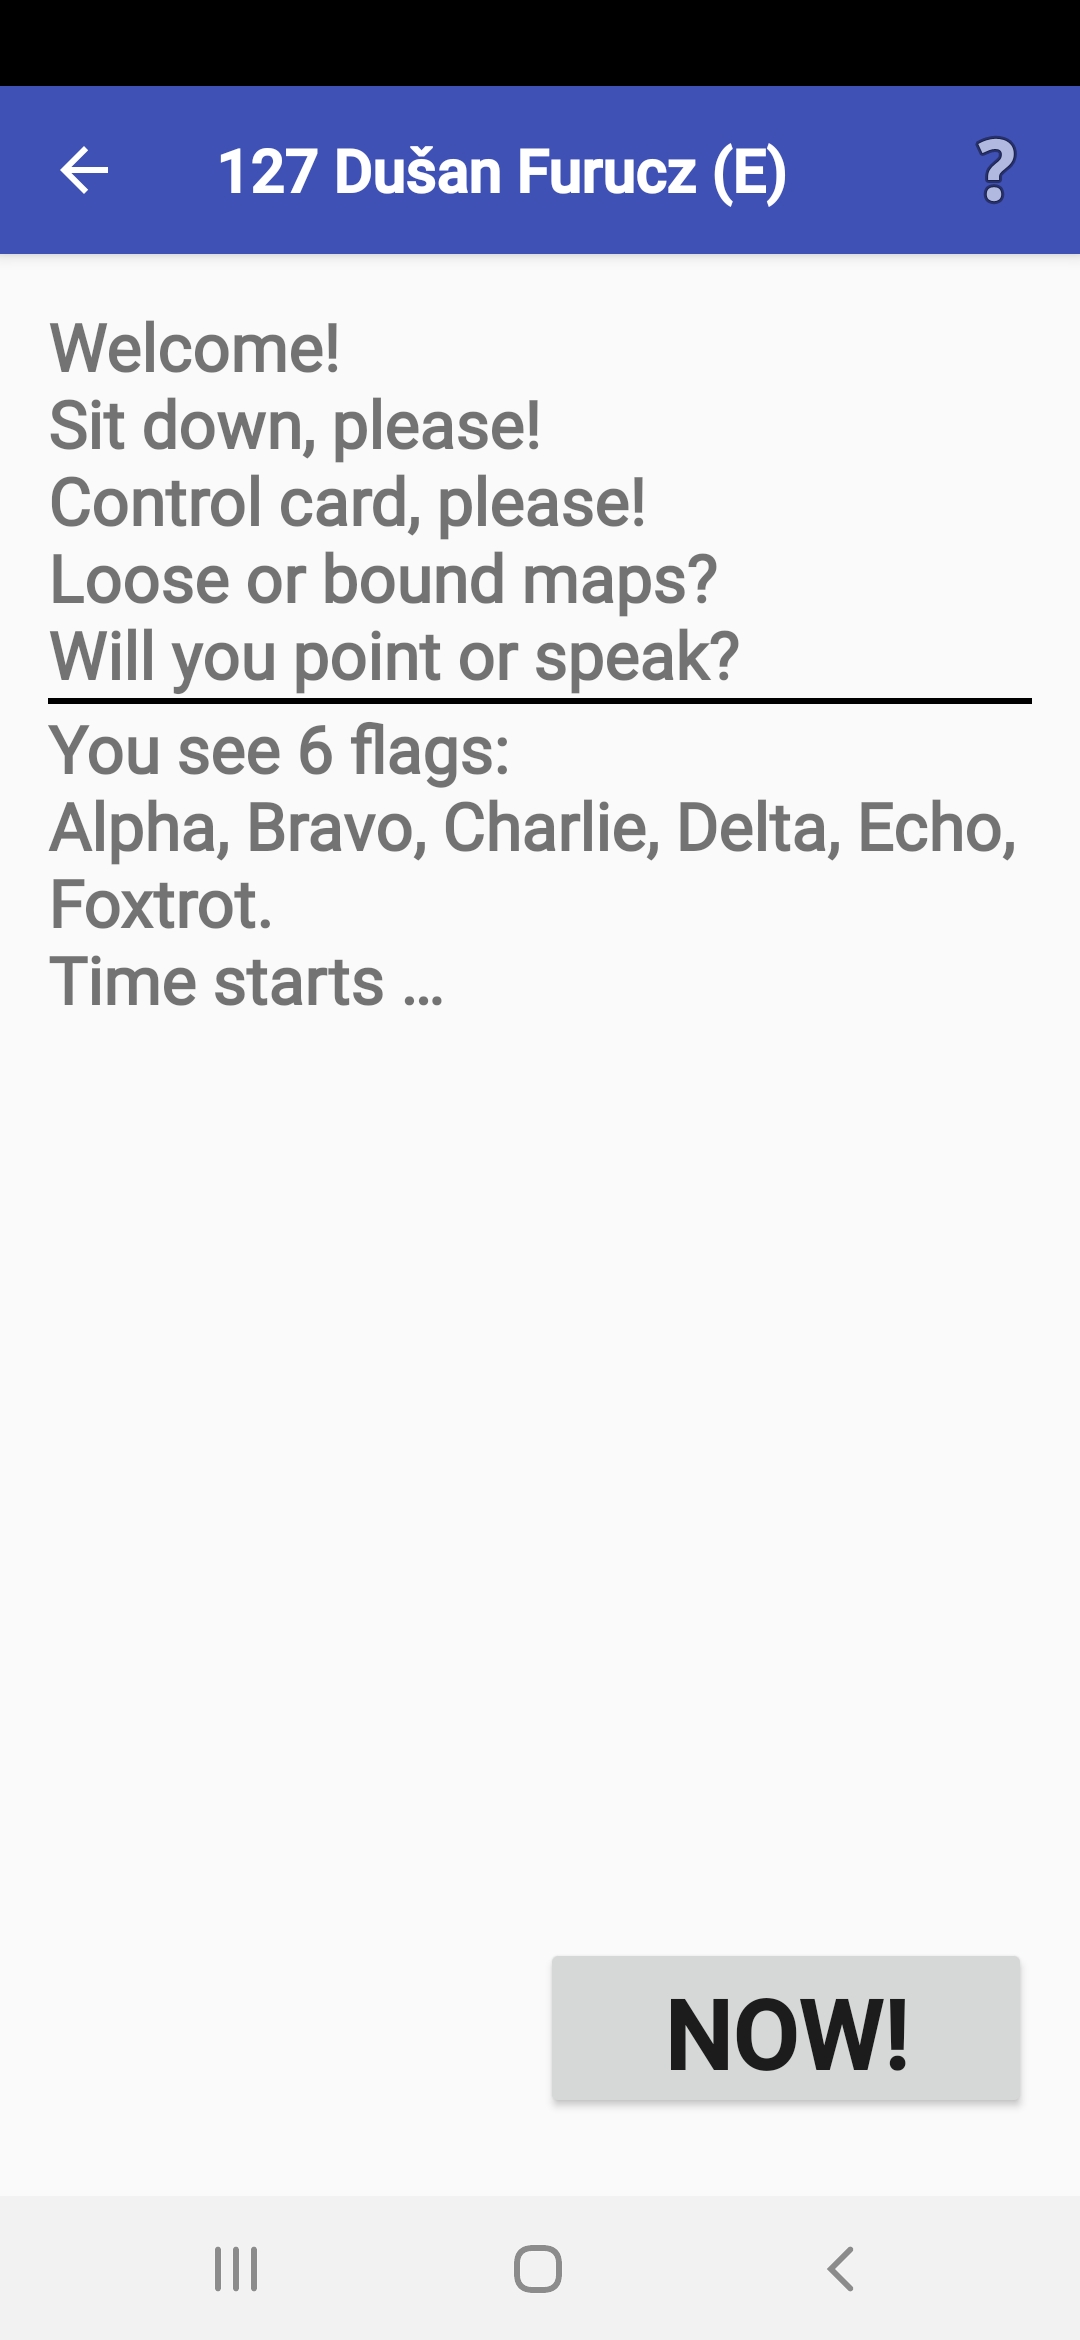
- At timed controls,
ANT displays instructions and questions that marshals must give to competitors.
They have two parts: one is given before the scene is shown,
the other afterward.
You can choose whether ANT shows them on two separate screens
or together on a single screen.
- To prevent unintentional answers selection when punching,
you can protect task selection by configuring ANT
to require a double-click when you select a task,
or to require confirmation of each task selection via an extra button.
- After reading out a ToePunch system chipset,
the competitor's punching and time can be printed on a Bluetooth printer.
You can switch this feature on or off and select a printer
in the menu Preferences.
- At timed controls,
an audio recording of the competitor's answers is possible.
Playback is available
in the competitor's results editing mode.
- If two marshals are timing, only one of the devices is allowed to upload data to the server! The default mode is a backup device.
Setting System Permissions
-
ANT needs certain system permissions set
so he can control mobile behavior during work.
Dialogs for these settings are automatically invoked
only when needed in the current mode
and should be accepted by the user.
-
ANT needs permission to change the phone/tablet's general settings
to turn off automatic sleep mode.
-
If access to this setting is not permitted,
you should manually set the screen off timeout to several minutes.
-
If access to this setting is not permitted,
you should manually set the screen off timeout to several minutes.
-
ANT needs access to the "Do Not Disturb" mode setting
so it can reject incoming calls only during the timer's run.
⚠ Some phone applications are so invasive that they ignore this setting. We recommended making a test call to the device while measuring times! ⚠
-
If access to this setting is not permitted,
you should turn off incoming calls manually.
-
If access to this setting is not permitted,
you should turn off incoming calls manually.
-
If the organizer wants to record competitors' oral answers,
ANT needs permission to access the microphone and record audio.
The recording is limited
to the time the clock is running
and can be used to check the answers given.
- If audio recording is not permitted, competitors' answers are not recorded and cannot be checked afterward.
-
ANT needs access to Bluetooth
to print competitors' punching
on a BT printer.
- If access to Bluetooth is not permitted, you cannot print competitors' punching.
Race Configuration
- The Race menu item
lets you change the race configuration,
i.e., to choose a new race
or modify the attributes of an already loaded configuration.
Most users will never need it.
- Before using ANT for a new race,
you should use the Clear Race button to clear the old configuration.
If there are also old result files,
the program will ask whether to delete them.
- Respond No in typical cases.
Files from old races cause no problem,
and they might be used later for further analysis.
- Respond Yes if you tried the application before
the race and stored meaningless data
related to the current race,
or if you want to remove all old audio files.
- Respond No in typical cases.
Files from old races cause no problem,
and they might be used later for further analysis.
- If you have a configuration file prepared,
you only need to configure the Configuration File item
according to the organizer's instructions
(see Selecting Resources/Targets),
and the application will load the configuration automatically.
This completes the configuration,
and you can close the dialog using the Done button.
- The following steps are typically needed only
if you create a configuration by yourself.
- The Race ID item is needed for distinguishing races
when processing multiple result files.
- If you configure a race on a day
other than the competition day, you can change the date.
- Depending on the current application mode,
you can change some race settings,
e.g., whether competitors can answer in free order
and whether they can change their answers.
- For testing purposes, you can enable
Test mode,
which prevents ANT from setting the Do Not Disturb mode and screen-off timeout.
- The ToePunch system chips can be used
to save competitors' result at a timed station.
- You can lock the menu
so that competitors cannot change race settings.
You must then set a PIN and/or a set of chip numbers
for marshals, to be able to unlock the menu.
- For timed controls,
you can specify that a second timekeeper
will be used and both times will be stored
in the result file on one of the ANT devices.
This device also uploads data to the server.
To set the Master/Backup device,
visit the Setting Preferences menu.
- At timed controls,
an audio recording of the competitor's answers is possible.
Playback is available
in the competitor's results editing mode.
- Instructions to be displayed or told to competitors
may be in English or in the application language.
- At timed controls,
ANT displays instructions and questions that marshals must give to competitors.
They have two parts: one is given before the scene is shown,
the other afterward.
You can choose whether ANT shows them on two separate screens
or together on a single screen.
- It is also possible to choose
which information and questions
to display and in what order.
- If ANT is calculating results, you can choose
whether newly arrived competitors will be added
to the local startlist on your mobile phone.
- If ANT is calculating results, you can choose whether they will be displayed in complete form or without answers, points, and times.
- The Race ID item is needed for distinguishing races
when processing multiple result files.
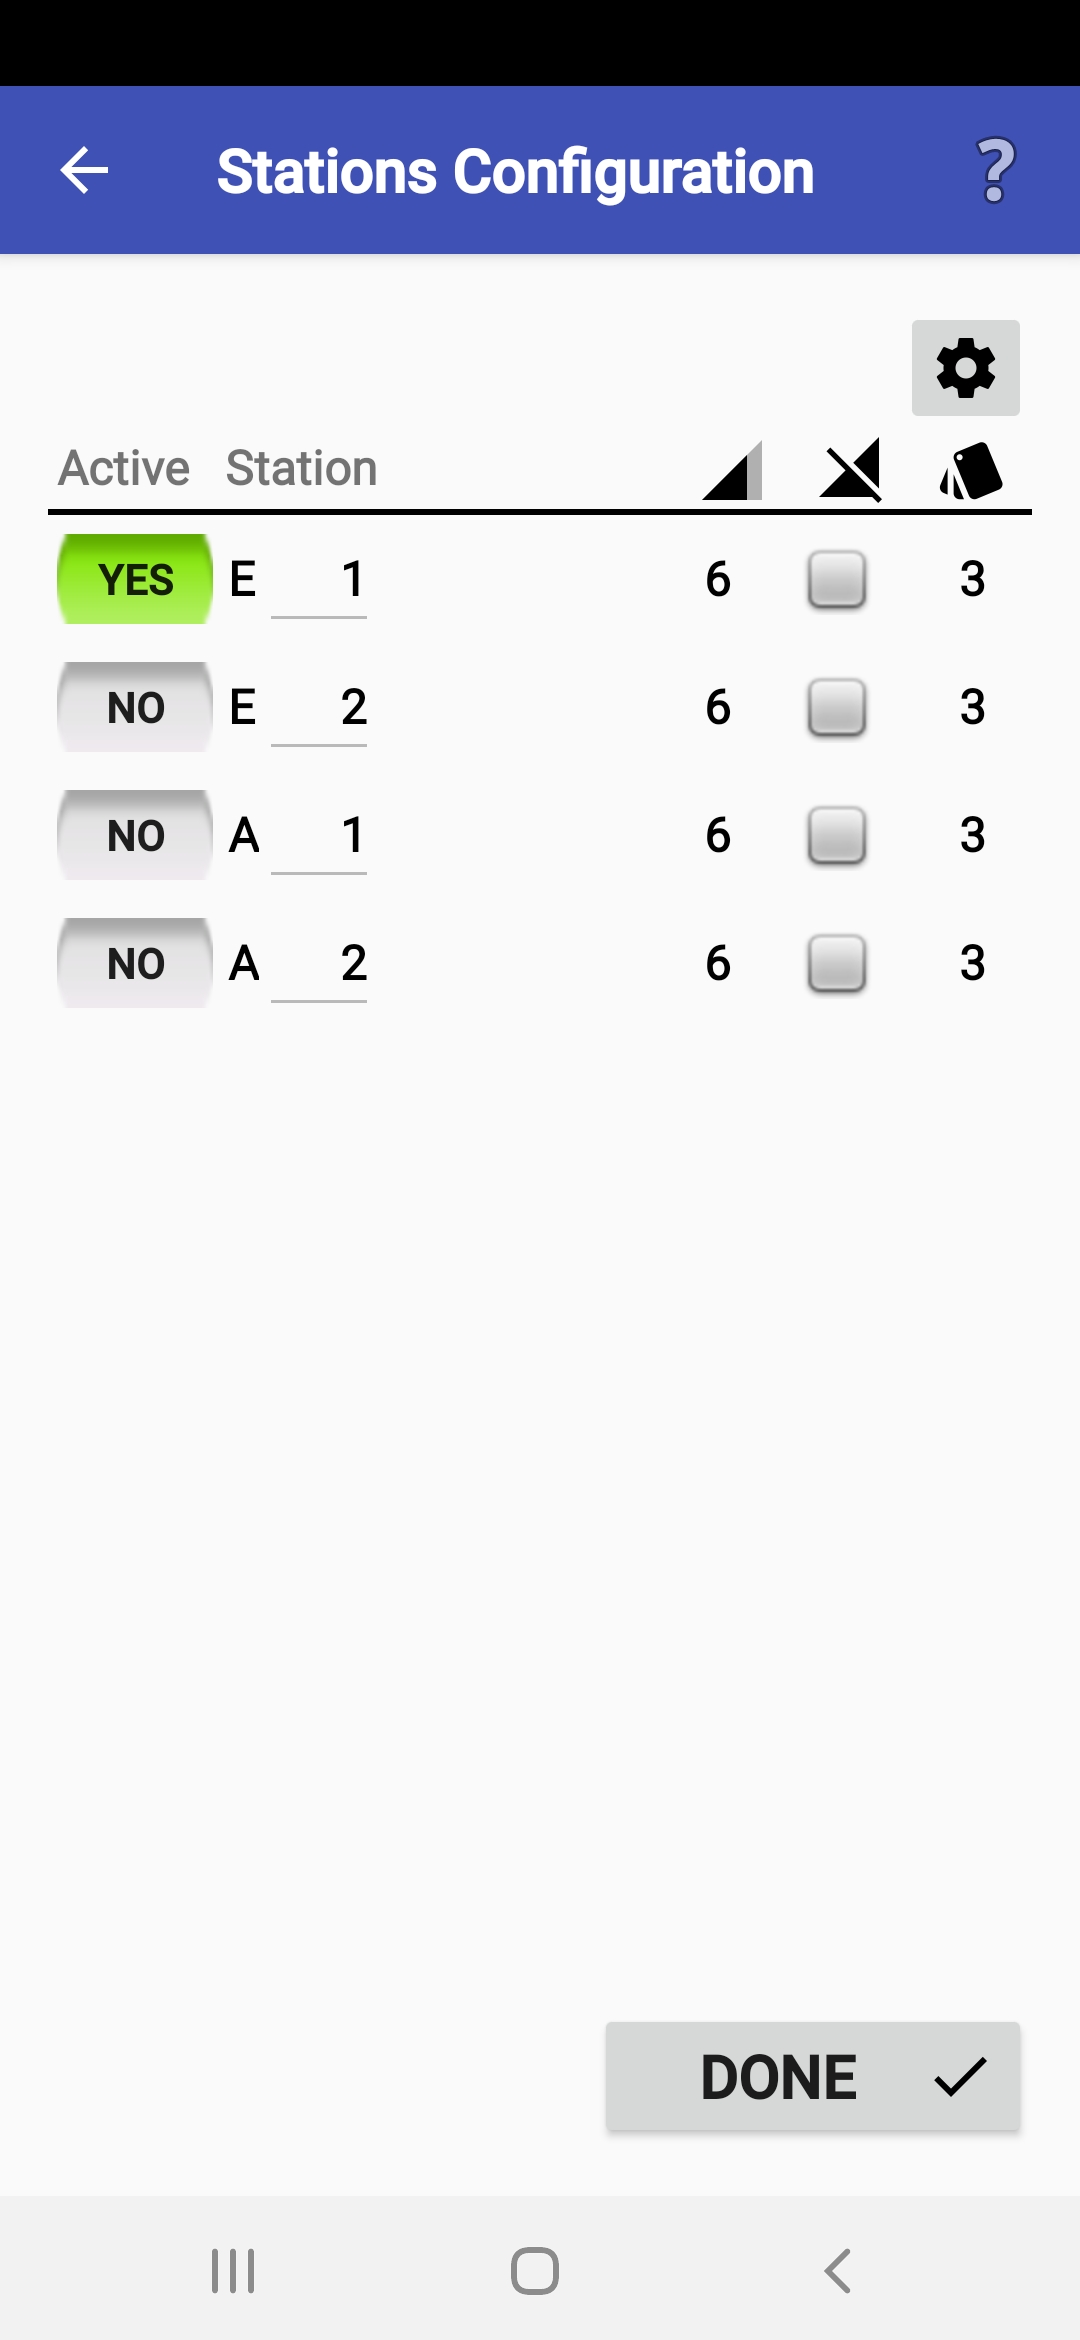
Stations and Courses Configuration
- The Stations and Courses
menu items allow an organizer
to adjust various race parameters.
A regular user usually does not need it.
The only exception is when a marshal
activates the timed control station(s) where they will work.
This is done by clicking a button
at the beginning of the appropriate row(s).
- If you configure a race by yourself,
you must enter station/course data in editing mode,
which you can switch to by pressing the "gear" button
in the top right corner.
Station parameters:
- Class
(if defined by the organizer, e.g., category, stage, heat)
- Station/course part number,
- Number of flags at the station,
- Zero answers,
- Number of tasks at the station/in the course part,
- Time limit in seconds (timed controls only),
- Number of seconds before the time limit to warn competitors (timed controls only),
- Correct answers
(if ANT calculates race results).
- Class
(if defined by the organizer, e.g., category, stage, heat)
- The Add button
adds new stations/course parts.
- You must confirm your changes by pressing the Done button.
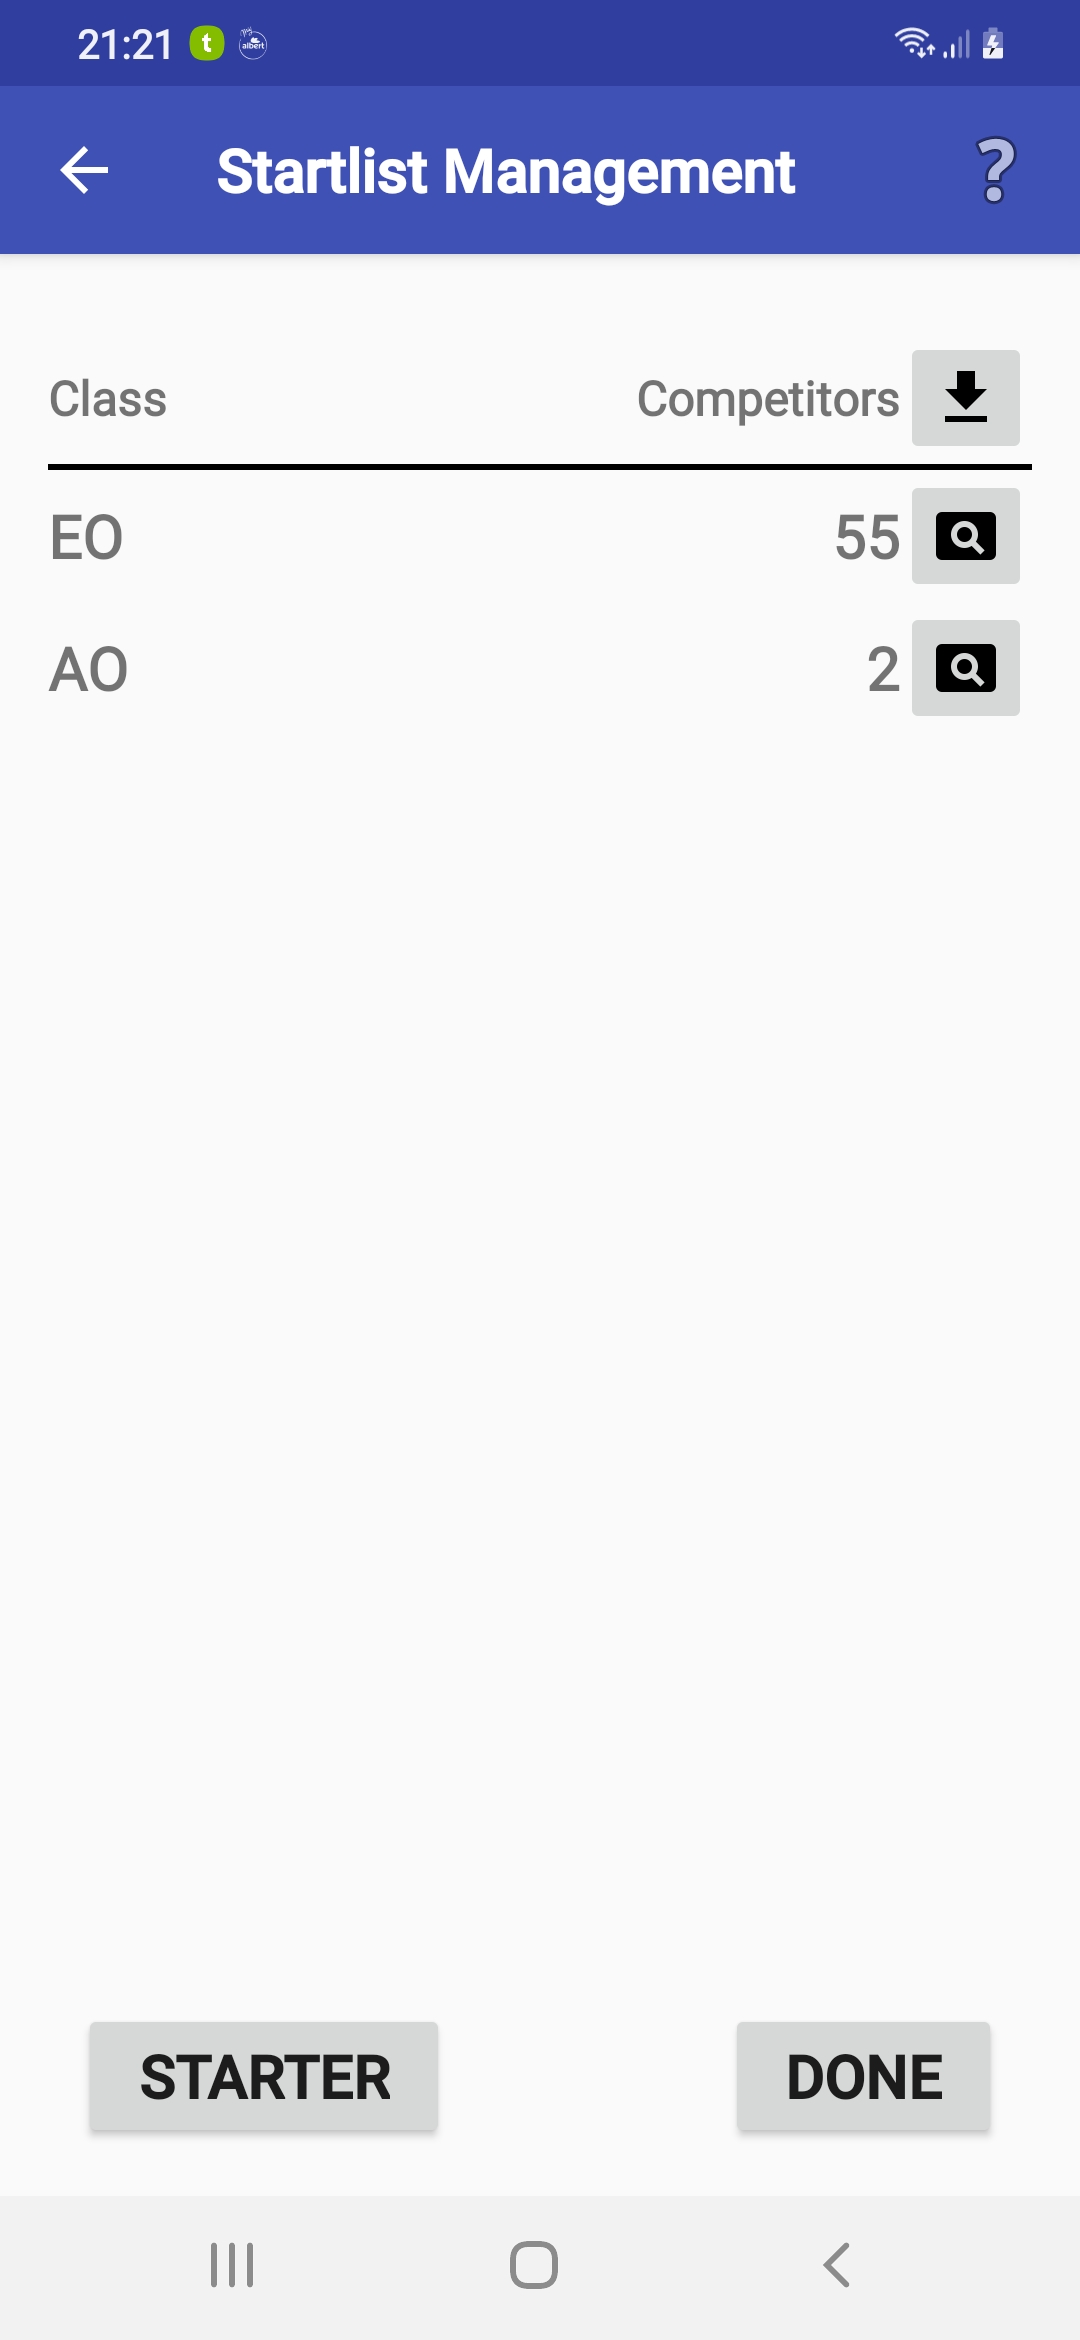
Startlist Management
- The Startlist menu item
lets you perform several operations on the startlist
(or, rather, the "list of participants").
- In the upper right corner,
you find a button with the download icon
(if the startlist source is defined in the configuration).
You can repeatedly download the startlist to your device
by clicking it.
- At the end of each row with a class,
there is a button with a magnifying glass icon.
Click it to display class startlist.
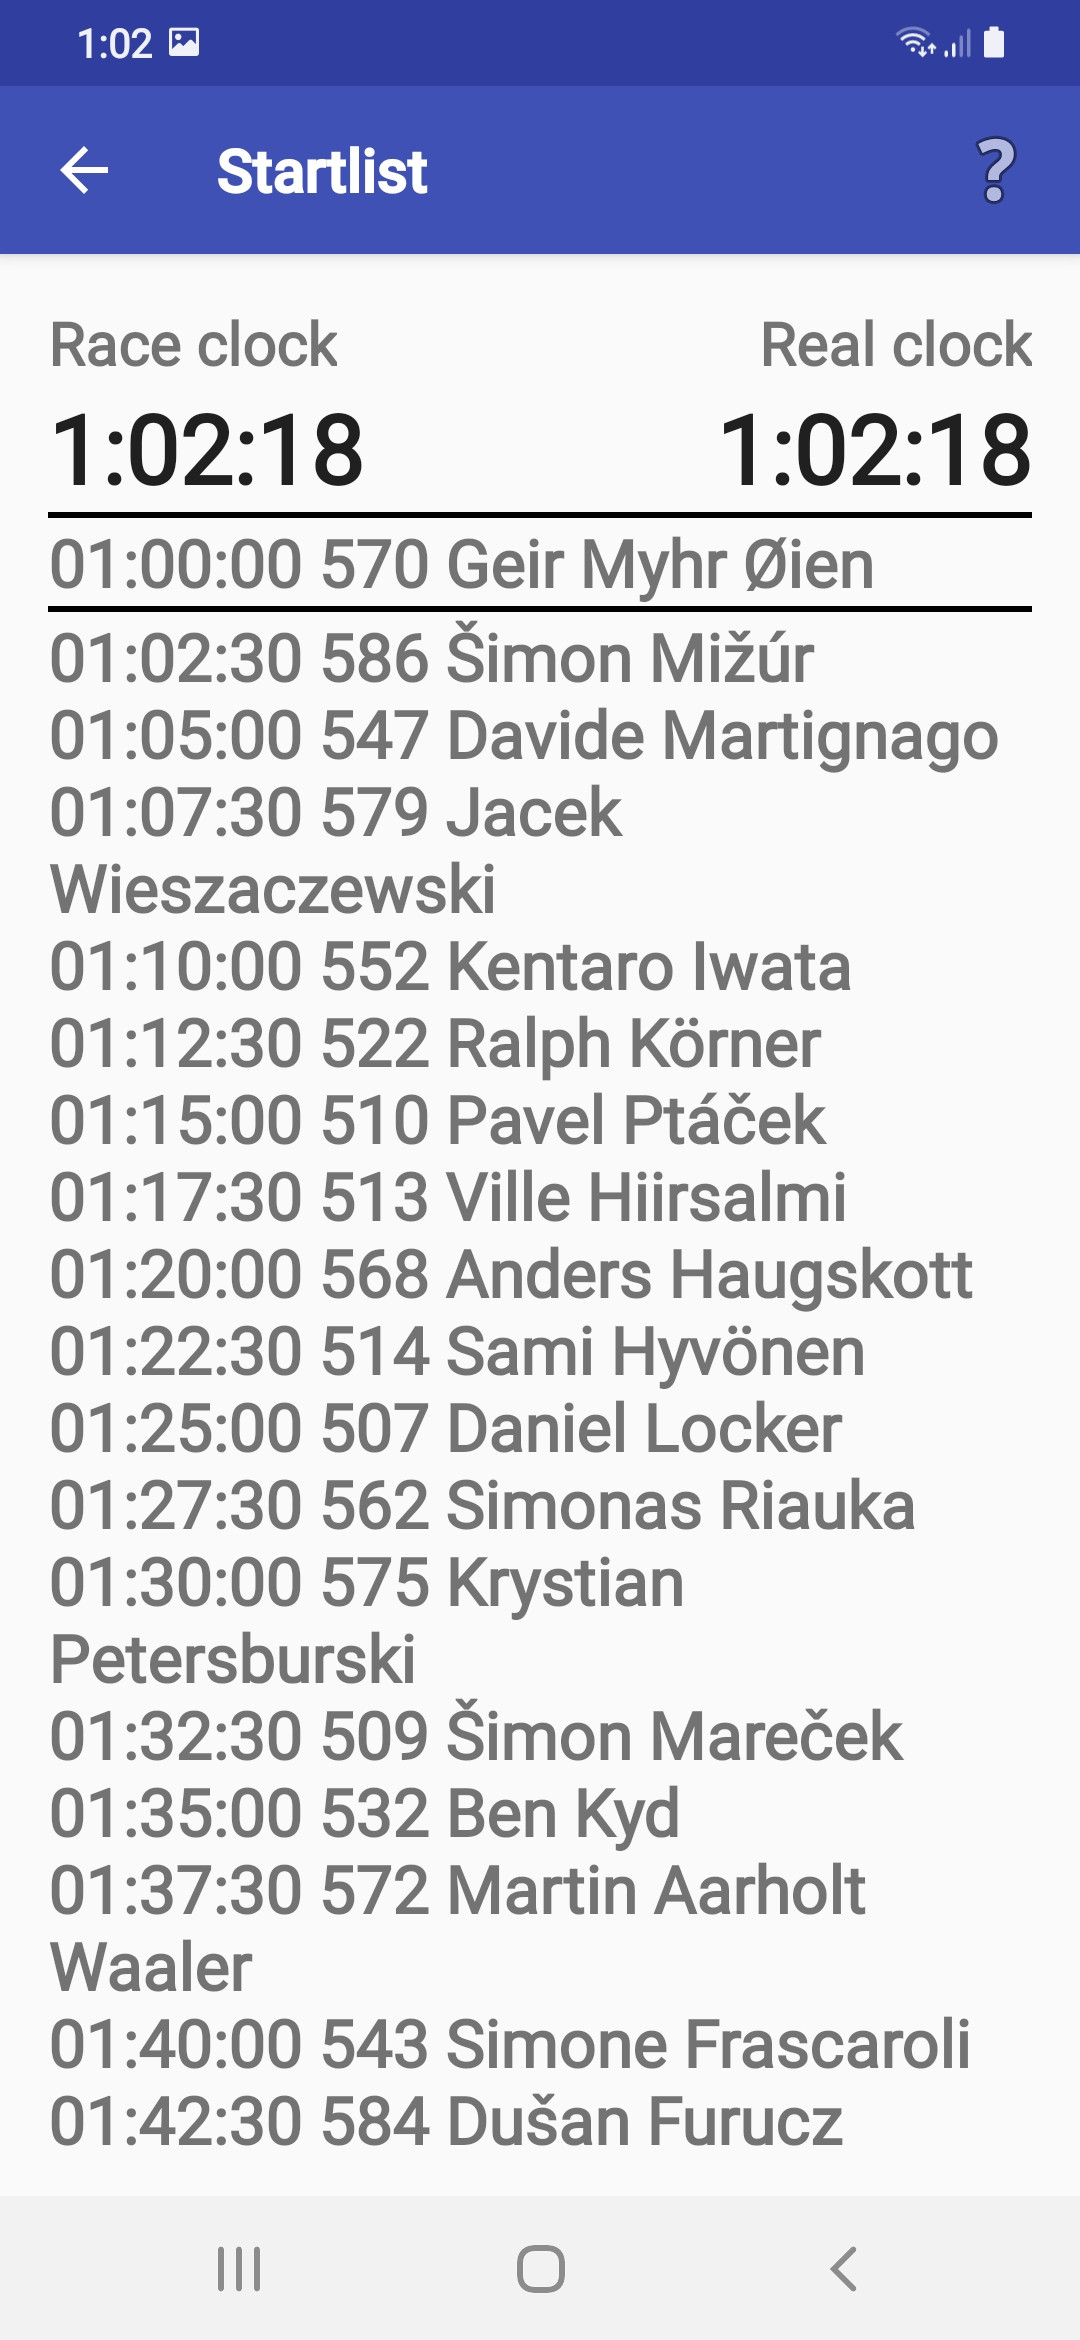
- The Starter button
starts the "starter clock".
After starting, a possible start delay is entered,
and then the running time
and the current cut-off of the startlist
corresponding to the current time appear on the screen.
- The application can work with a startlist
in several modes:
- The startlist is a part of the configuration file.
This is the most common way.
In this case, no special action is needed,
since the startlist will be loaded automatically
and can be reloaded by loading an updated configuration if needed.
- No startlist is used
(option No external startlist);
all competitors' names or numbers must be entered manually.
- The organizer has published a startlist
on a web server
and specified its URL address in the configuration file.
In this case, you can load the startlist
by clicking the download button.
- The organizer has provided a startlist in a separate file. In this case, you should enter/select its path (see the help for the Selecting Resources/Targets dialog), and it will be loaded.
- The startlist is a part of the configuration file.
This is the most common way.
In this case, no special action is needed,
since the startlist will be loaded automatically
and can be reloaded by loading an updated configuration if needed.
Map Configuration
- If you want to use the maps
shown at the ANT display at a timed control,
you have to define a map source:
- In the case of a web source, enter the URL address.
After the tarball with maps is downloaded,
it will be extracted to an internal directory.
- If the maps are already present on the local filesystem,
you have to specify the root directory
(either with maps or with per-class directories containing maps).
- In the case of a web source, enter the URL address.
After the tarball with maps is downloaded,
it will be extracted to an internal directory.
- While registering answers,
the device display orientation is fixed.
You can choose portrait or landscape orientation based on
which best suits your map format.
- For each station,
you have to set the following attributes:
- Map image zoom (in %).
- A flag indicating whether maps are complete
(they include control descriptions and a north arrow) or whether the maps and descriptions
are in separate files.
- The requested counterclockwise rotation angle
(i.e., viewing direction in degrees).
- A flag indicating whether the map is to be cut
in a circular shape.
- Map image zoom (in %).
- You can preview maps for a station
by clicking the magnifier button.
- You must confirm your changes by clicking the Done button.
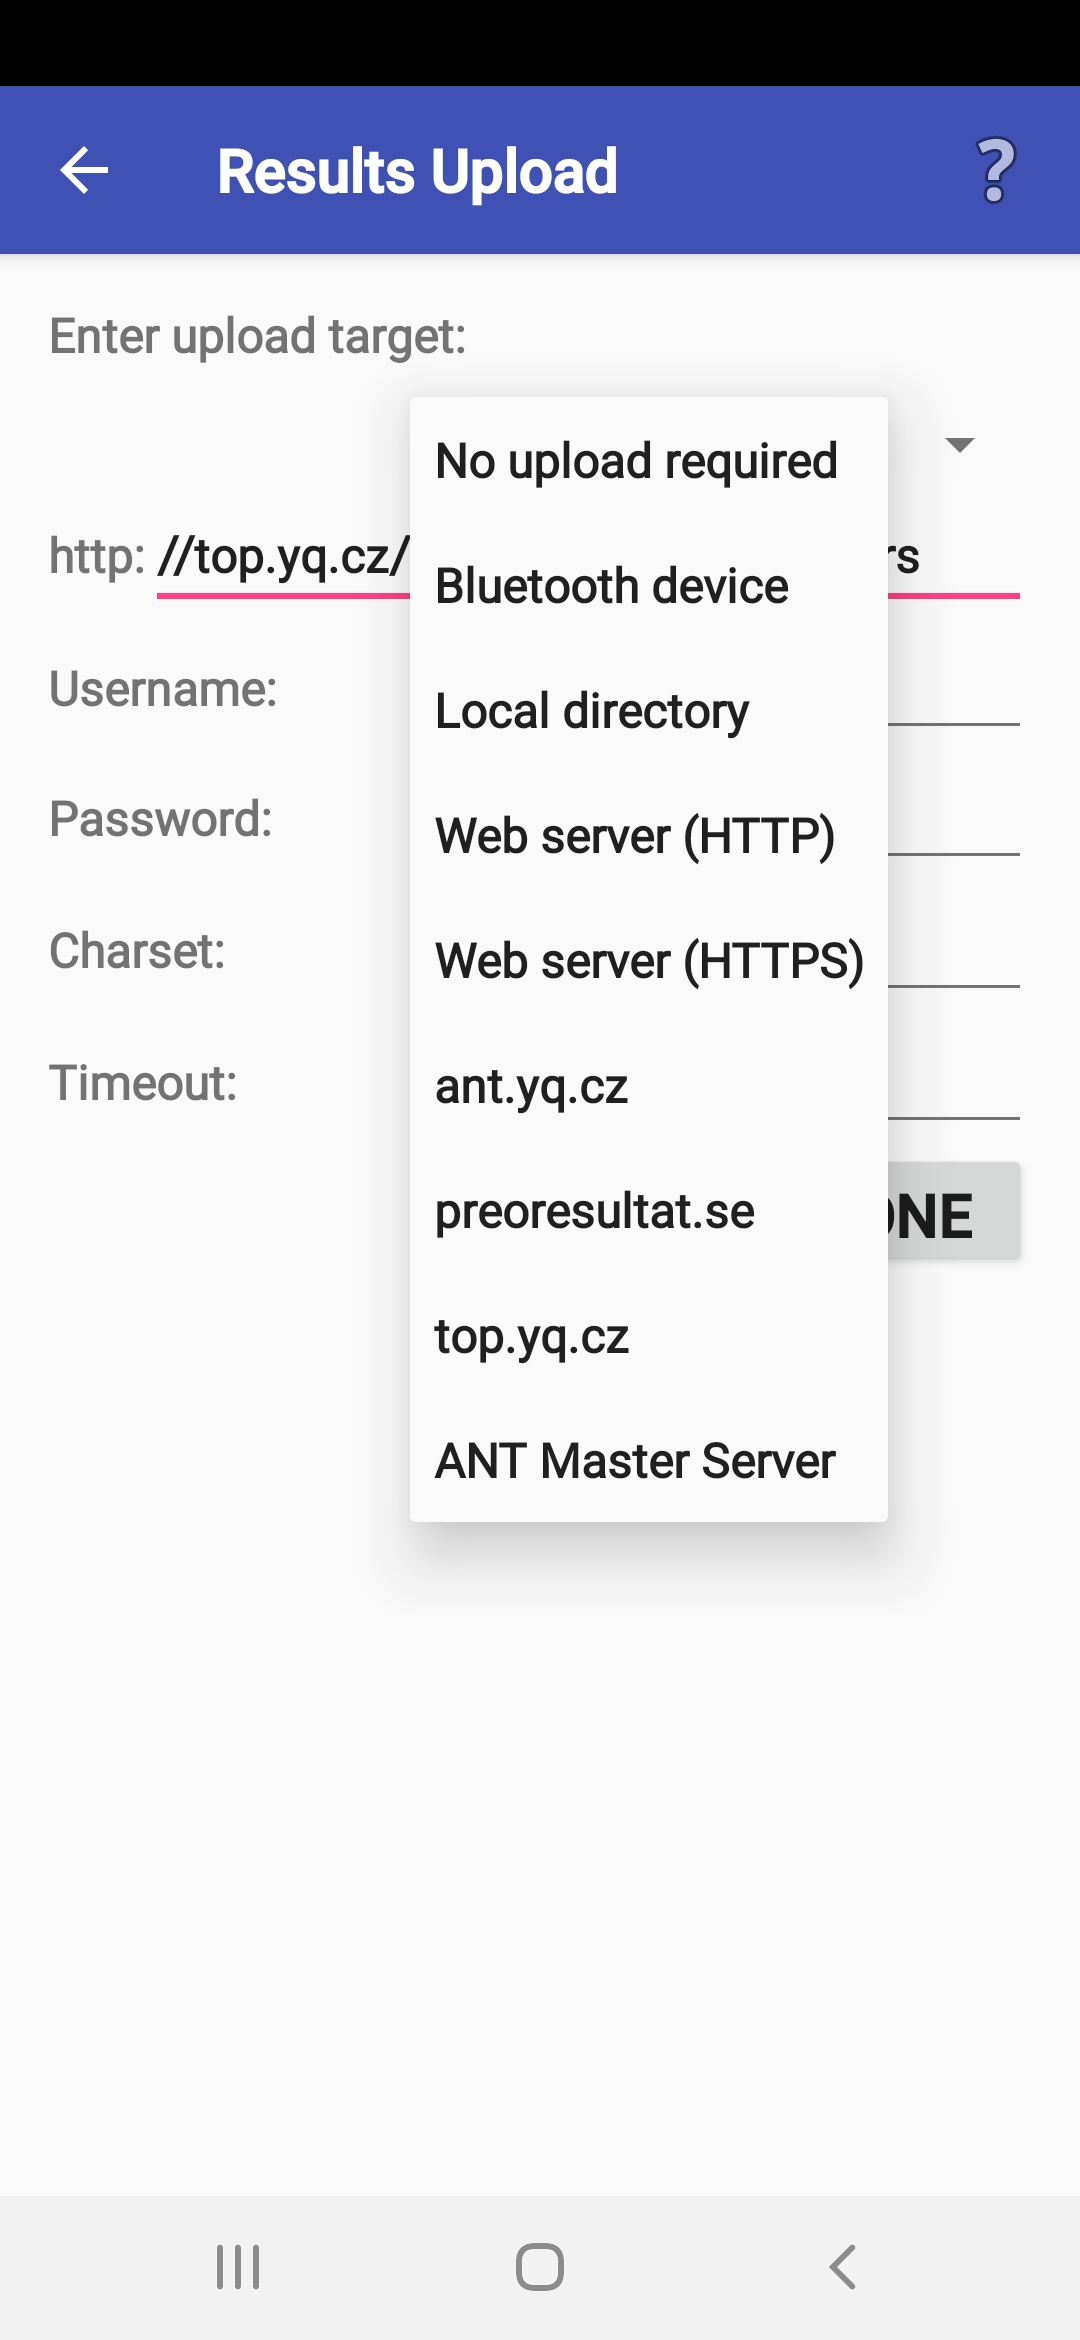
Selecting Resources/Targets
- This dialog appears in several situations where a resource
(for data input or output) nust be selected.
If you are a marshal or a competitor,
you will typically use it only once
to select the location of the race data provided by organizers.
- The resource can be located in various places:
- If the resource is on a web server,
you should enter the URL address (except for servers
top.yq.cz, ant.yq.cz, and preoresultat.se, whose URLs are known).
Besides the address, the race ID is usually required.
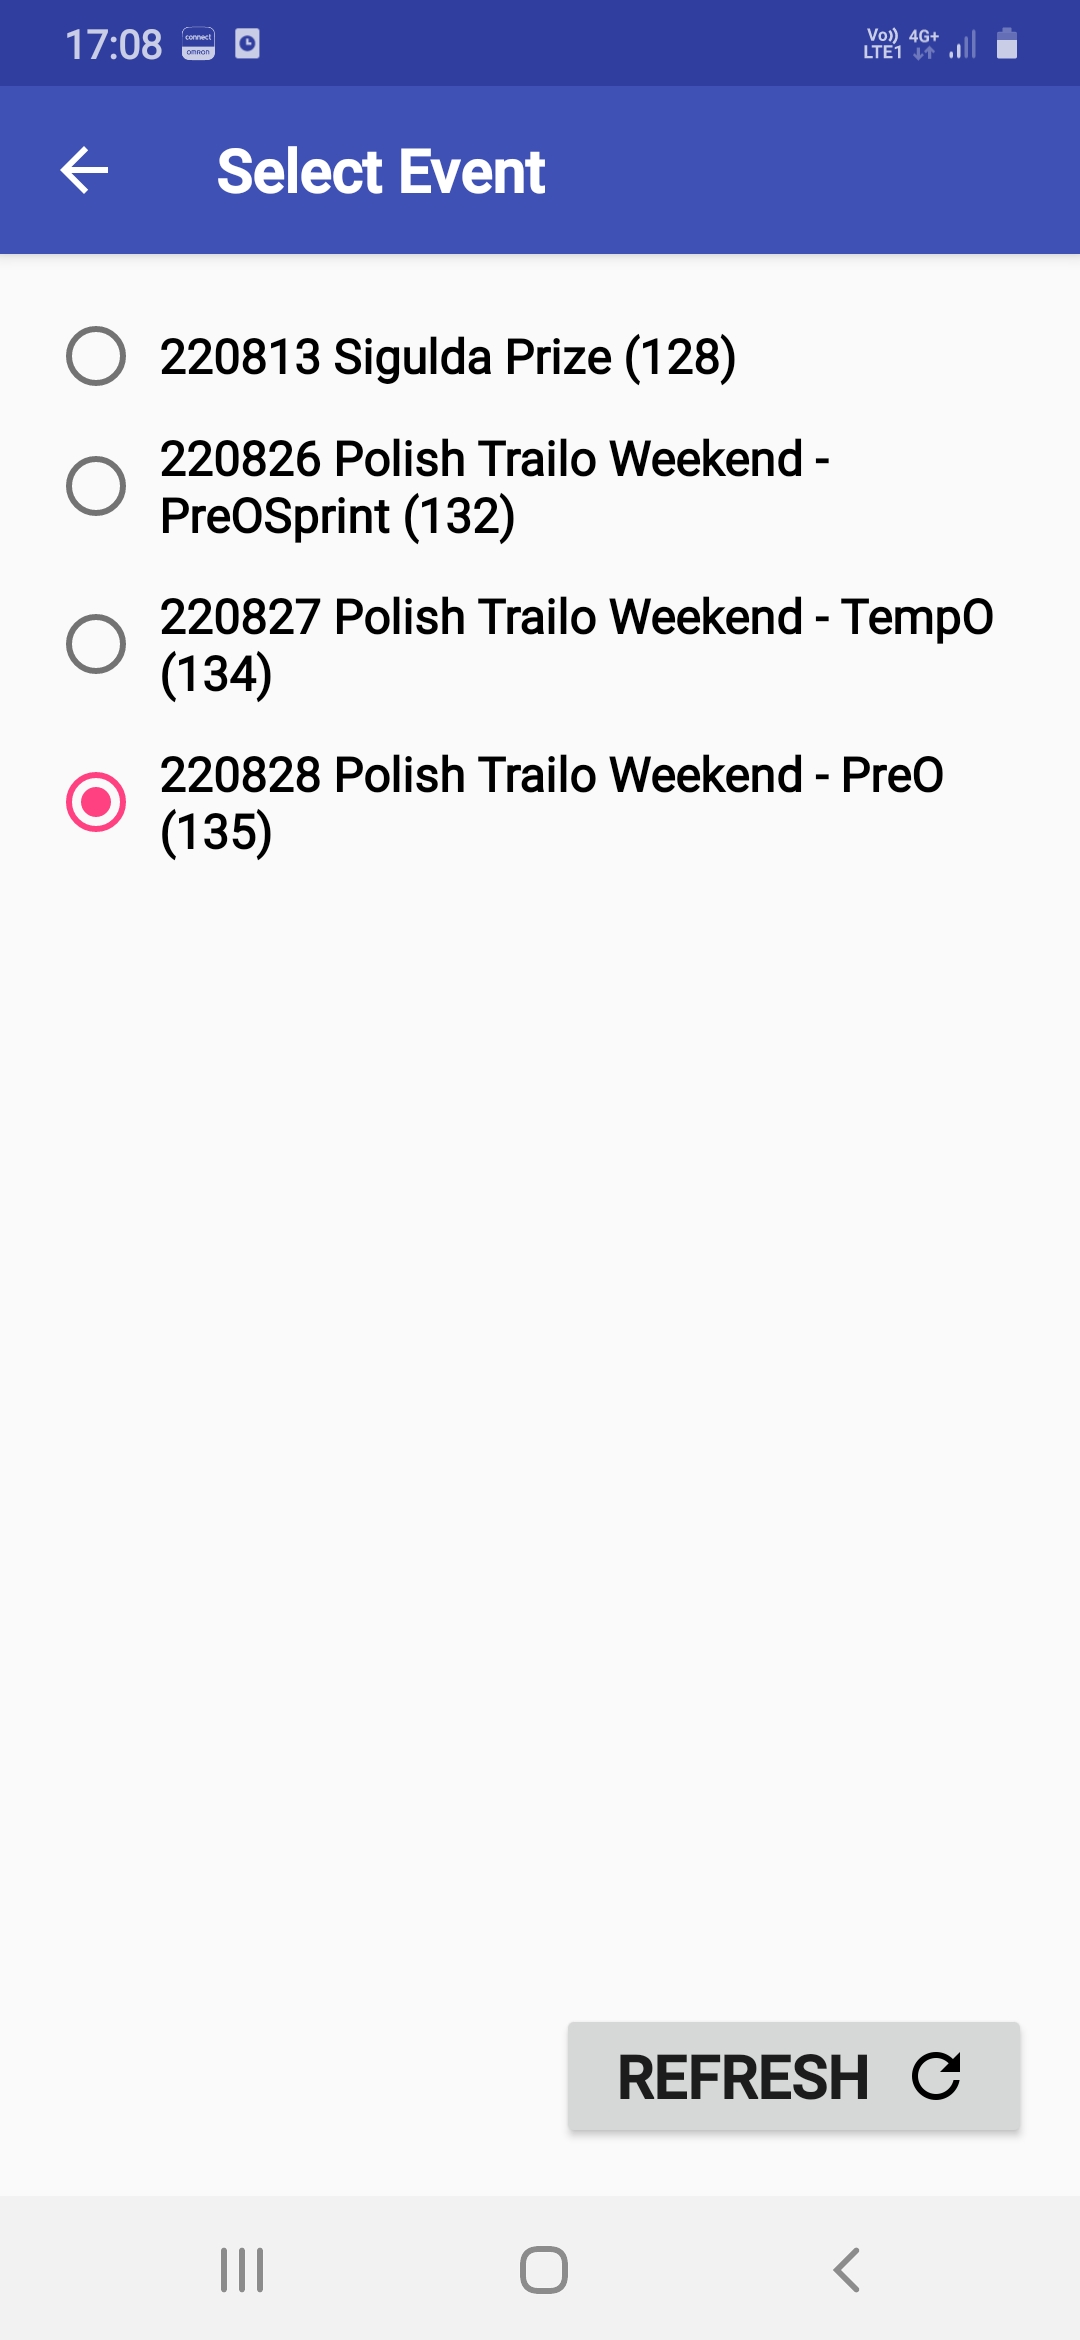
If the server supports this function, you can download
the list of races (using the button with the magnifier icon)
and select the correct one by clicking a corresponding list item.
- If the resource is on a server running on
another ANT device (ANT Master Server),
you must check and possibly correct the IP address in the URL.
- If the resource is on the local filesystem,
you can enter a file or directory path manually
or select it by browsing the disk (using the magnifier icon button).
- If the resource is on a device
connected via Bluetooth,
you will need to switch Bluetooth on and pair the devices.
ANT will open the appropriate system settings dialog.
- If the resource is on a web server,
you should enter the URL address (except for servers
top.yq.cz, ant.yq.cz, and preoresultat.se, whose URLs are known).
Besides the address, the race ID is usually required.
If the server supports this function, you can download
the list of races (using the button with the magnifier icon)
and select the correct one by clicking a corresponding list item.
- Any additional data
(e.g., password, character set, etc.)
provided by the organizer should be entered into the appropriate fields.
- For HTTP uploads, you can specify a timeout to prevent an extremely long wait in case of network problems.
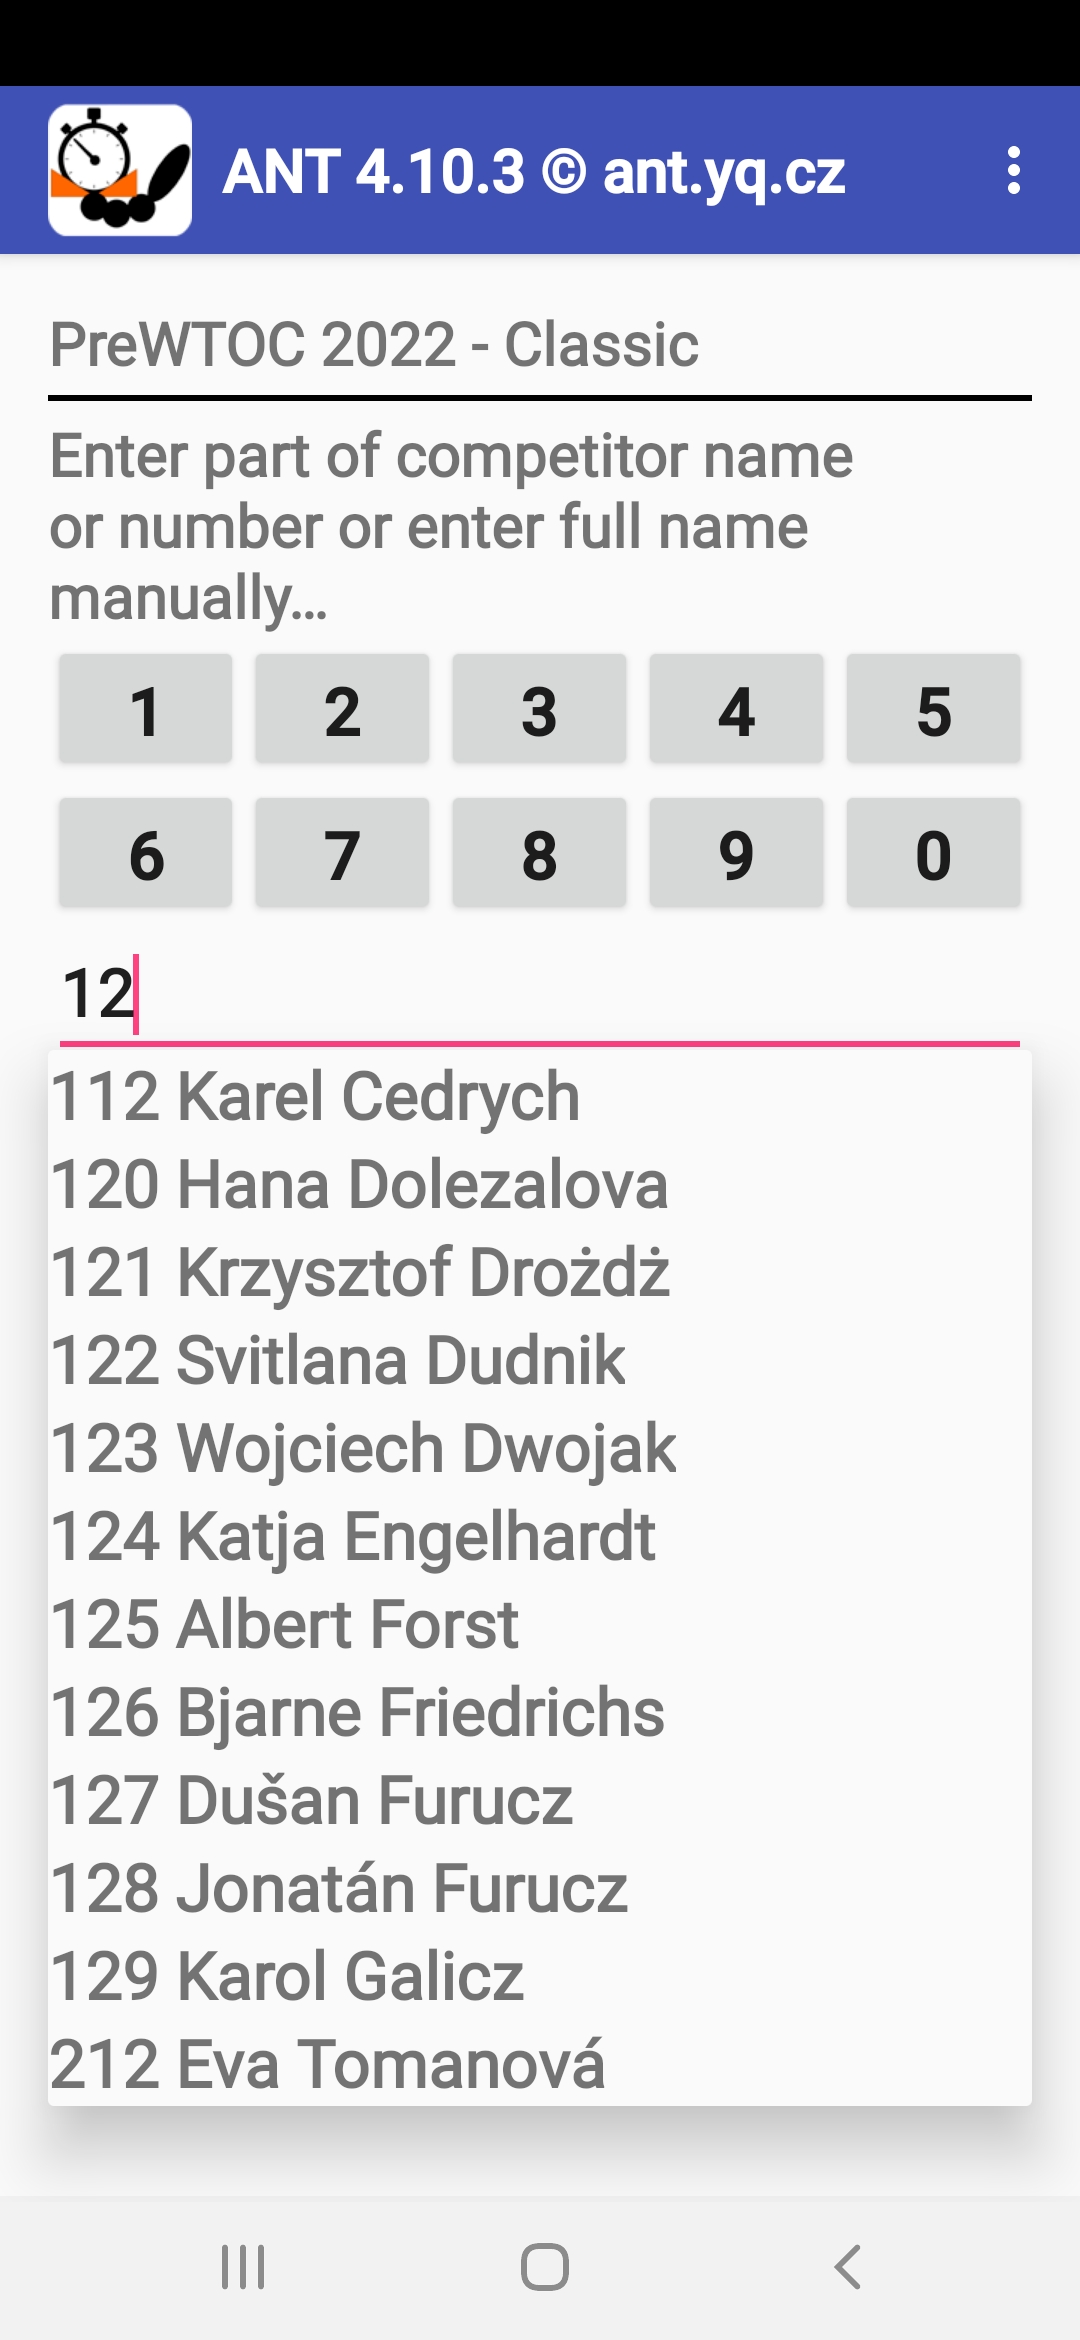
Selecting Competitors
- A competitor name and/or start number
can be either selected from the startlist or entered manually.
- If ANT knows your mobile/tablet type,
a green marker on the screen indicates the NFC reader's position.
It is placed either approximately in the middle of the device,
or at the edge or corner in the arrow direction.
The chip must be placed on the device's reverse side. For Toe chips,
any chip from the set can be used.
- If you have a startlist,
you can type any part of the name or number
(and thus avoid typing any non-ASCII/national alphabet characters),
and a scrollable filtered list of competitors will appear.
- If you use a single space as the pattern,
you will get the entire startlist.
- If the list of competitors appears
and you don't want to select from it,
you can press the Back button or click out of the list.
- If you use a single space as the pattern,
you will get the entire startlist.
- If you use the application buttons with digits,
the filtered list is shown only
after you click the filter button (the funnel icon)
or when the selection is unique.
- Clicking the full funnel
shows all competitors;
clicking the empty funnel shows only those
who haven't finished a particular station/course part yet.
- Selecting competitors
in the vertical orientation of your phone/tablet
is better because the list of competitors appears immediately.
- In horizontal orientation,
you can achieve a similar effect by pressing the Done button
after entering enough characters of the name or number.
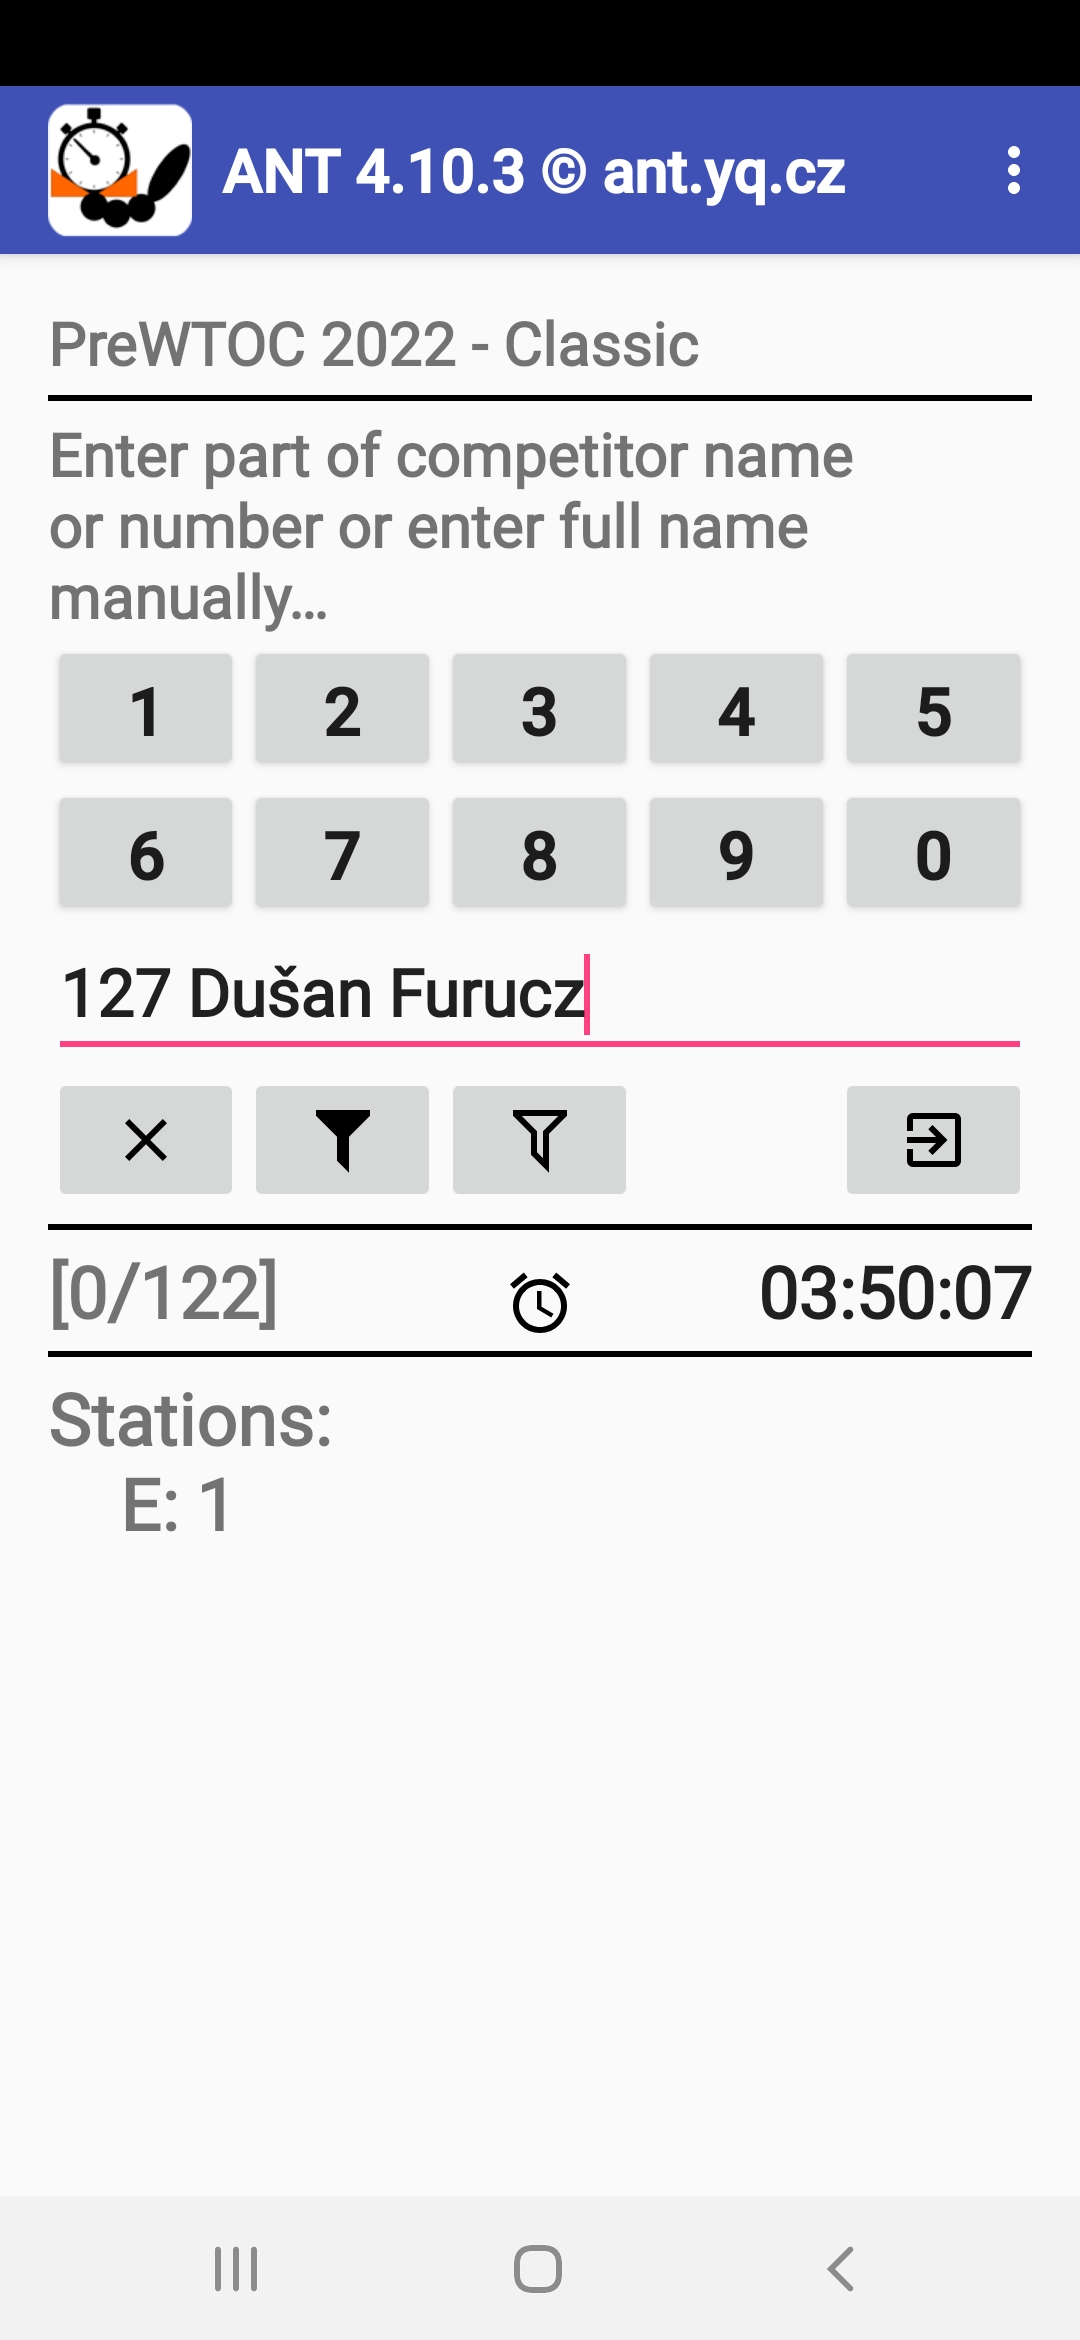
- If a competitor is not
on the startlist (or if you don't have one),
you must add them manually.
If start numbers are used in the race,
typing the number is sufficient.
Otherwise, the entire name must be typed.
If you publish results directly on the mobile, you will have to
type both the number and the name.
- Pressing the Back key returns to the main menu. From there, you can use the Marshal button to return to the competitor selection screen.
Marshal at a Timed Control
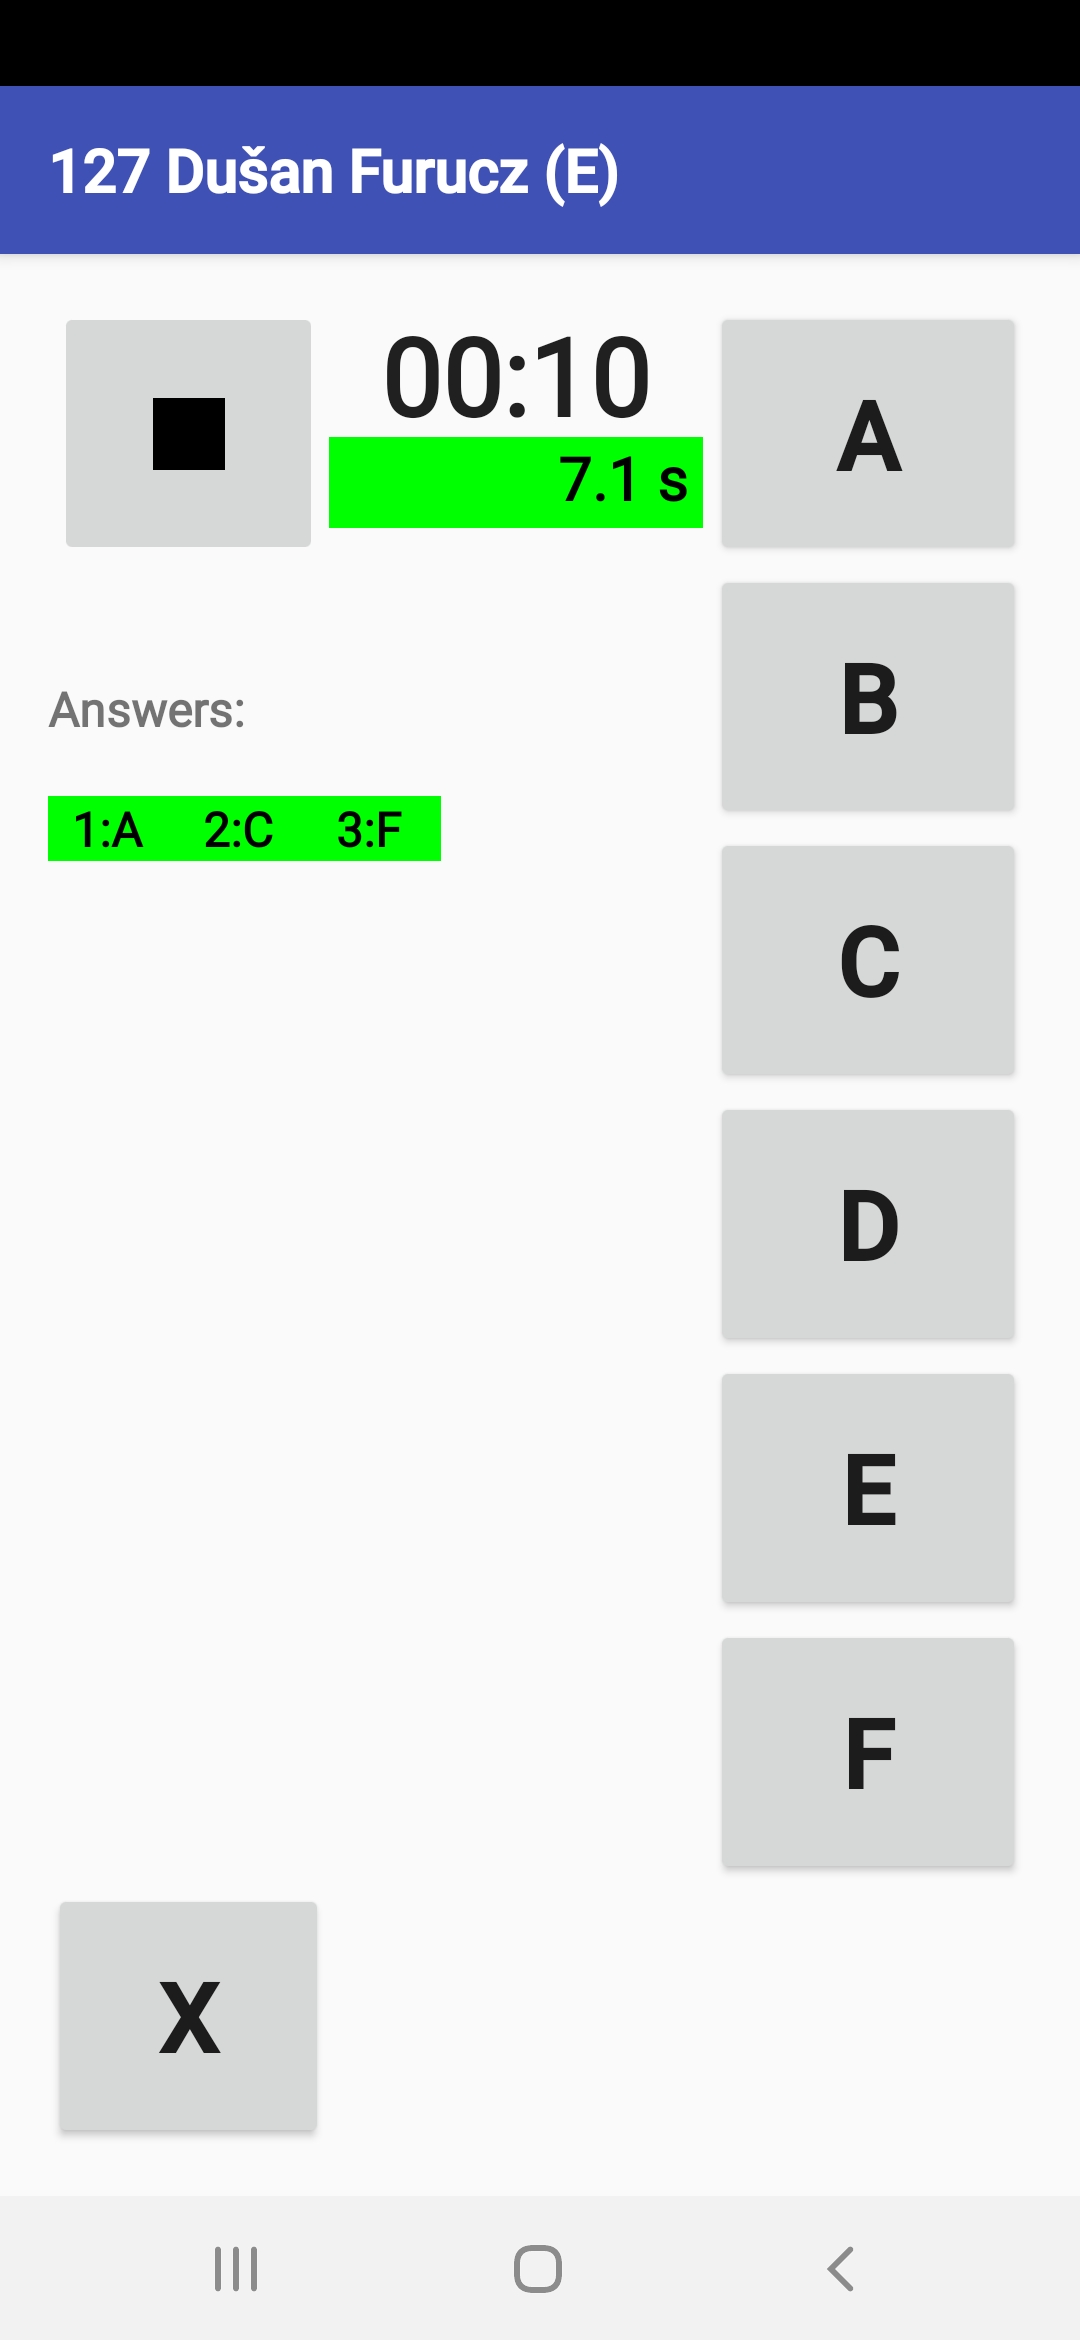
- As soon as you press the NOW! button,
the timer starts, and answer buttons
(incl. the X button for any invalid answer) appear.
Since this moment, you cannot return and
have to finish the procedure.
- After the last answer or when the time limit expires,
the Stop button (a black square) appears.
However, the timer doesn't stop,
and any additional answers and times will still be recorded
(for later use if needed).
- If you press a wrong answer button,
press the correct one afterward and keep going.
If you press a button by mistake, keep going.
ANT lets you correct mistakes such as these before saving the data.
- If you pressed the NOW!
button prematurely, you have two choices:
- Either just click an answer (e.g., X)
as many times as needed, stop the measurement,
and choose to edit of the record (see Updating Answers and Times).
Here, you can delete the record,
and the application will return to the selecting of the competitor.
- If only a few seconds have passed,
let the timer run, finish the start procedure with the competitor,
and press the X answer button
when the timing actually starts.
When the competitor completes the station,
go to the record editing,
where you can delete the entire initial part
up to the added first answer X
(using the Move start button).
- Either just click an answer (e.g., X)
as many times as needed, stop the measurement,
and choose to edit of the record (see Updating Answers and Times).
Here, you can delete the record,
and the application will return to the selecting of the competitor.
- If a call arrives while you are measuring time,
a phone application window may pop up temporarily,
covering the display.
In such a case, no action is required; the window will disappear
right away without disrupting the measuring process.
- The only way to exit this dialog is to press the Stop button.
Recording Answers and Times
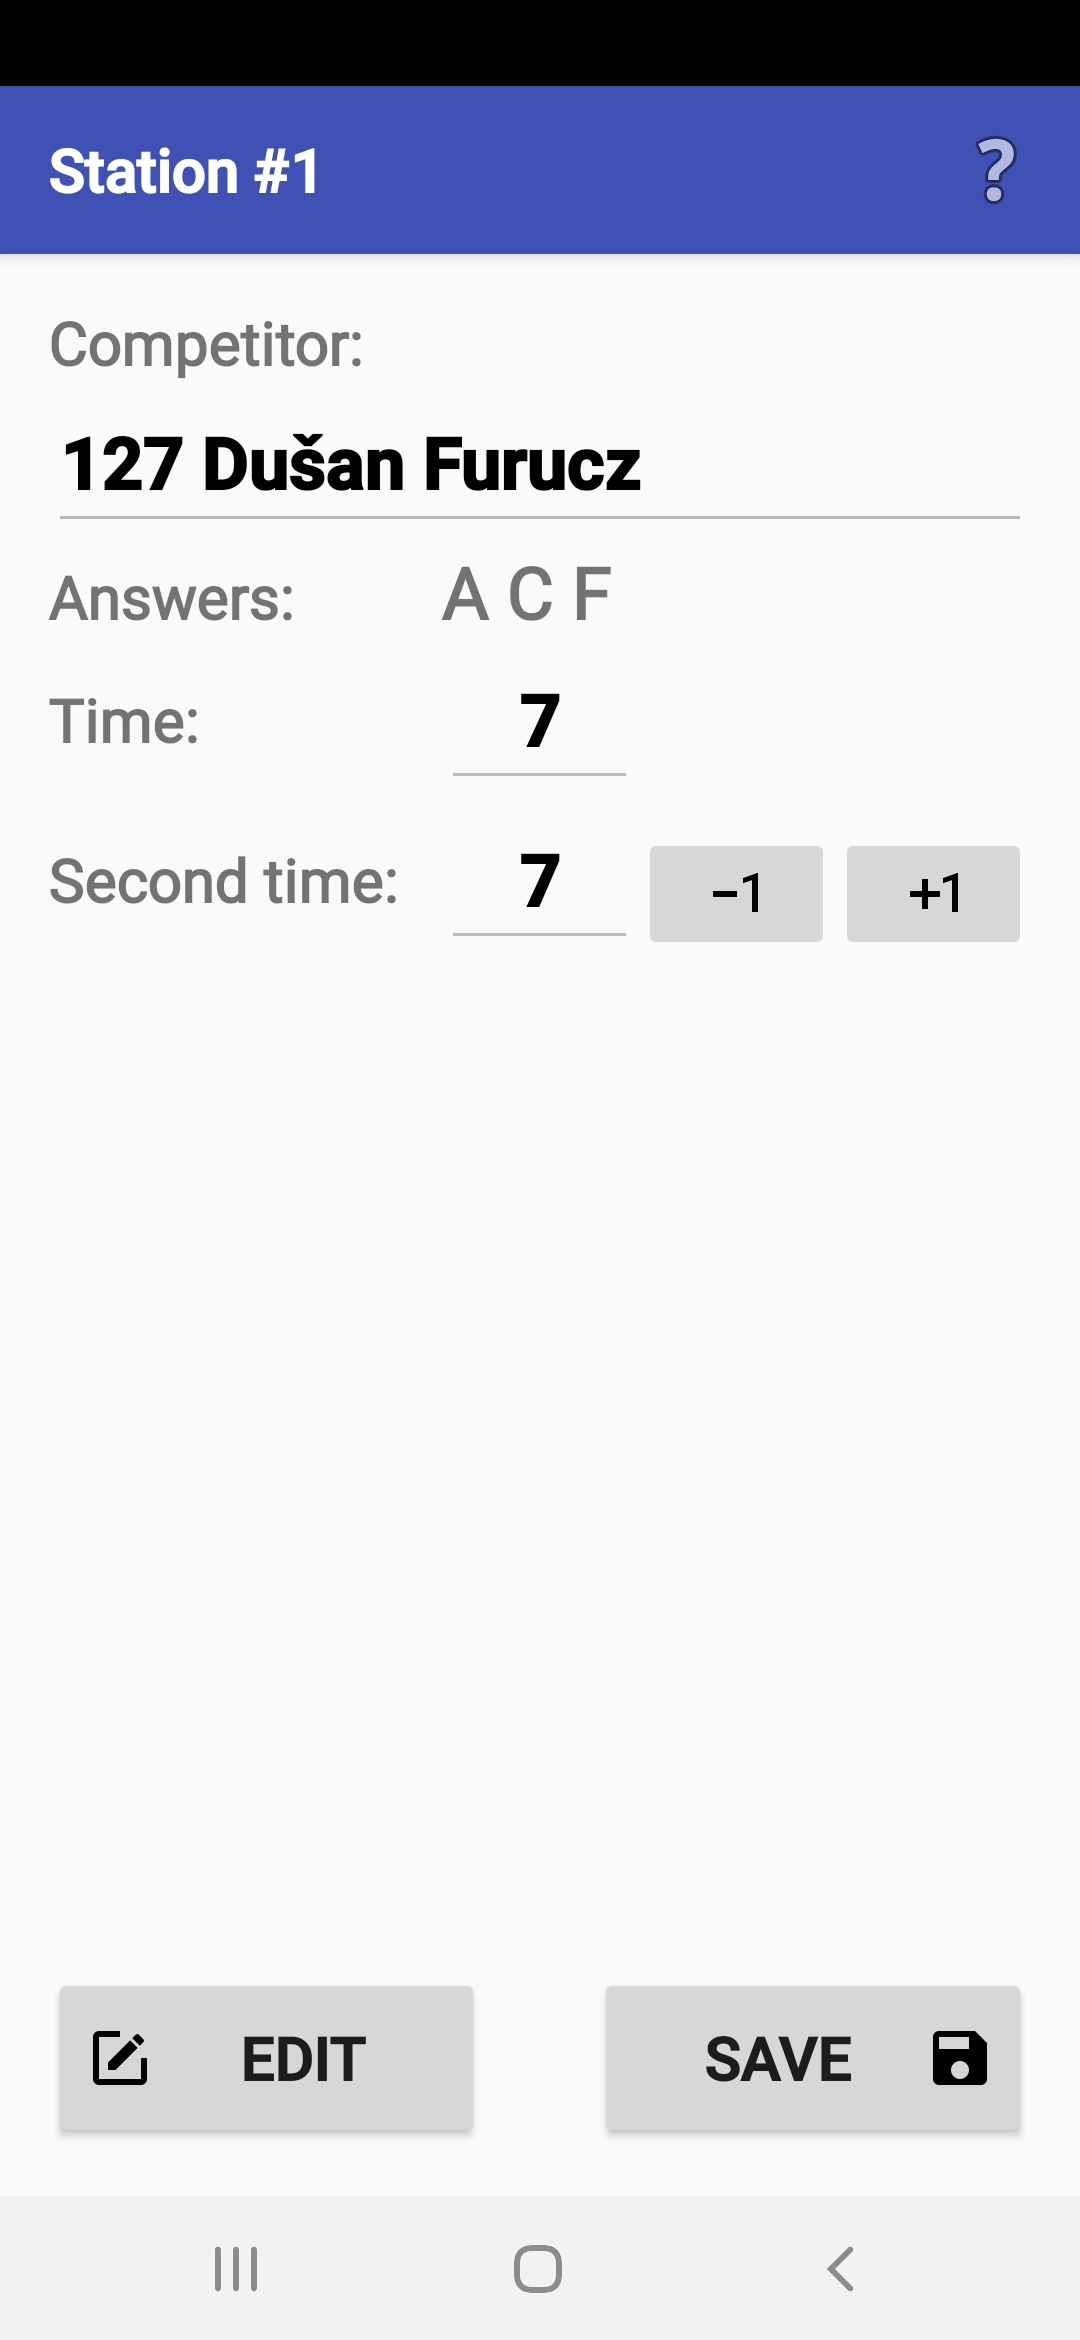
- After stopping the timer,
the competitor's answers and time will appear,
and you must finish recording the results.
- If everything was OK,
just press the Save button.
ANT confirms successful saving of the record
to the internal disc,
and you can rewrite the answers and time
to the competitor's backup paper card (if used).
- If there is a second timekeeper at the station,
you have to check and, if necessary,
adjust the time recorded by the second marshal.
- In the exceptional case
that a problem has occurred,
you can and should correct any incorrect data in the record
before saving and sending it to a server.
- If the organizer
has set an automatic upload,
it starts when you click the OK button.
If it fails, ANT allows you to change the upload settings.
If the automatic upload is not set,
you will send the results manually according to the organizer's instructions
(see Results Management).
- The organizer can also decide
to store timed control results
to competitors' ToePunch system chips
(see Recording Result to Toe Chips chapter).
- If you close the window too early
(e.g., before writing data to a paper record or a chip),
you can restart this dialog
using the Review last record action
in the Special actions item of the main menu.
- If you want to see the results later, you can visit the Results page and view the result file.
Updating Answers and Times
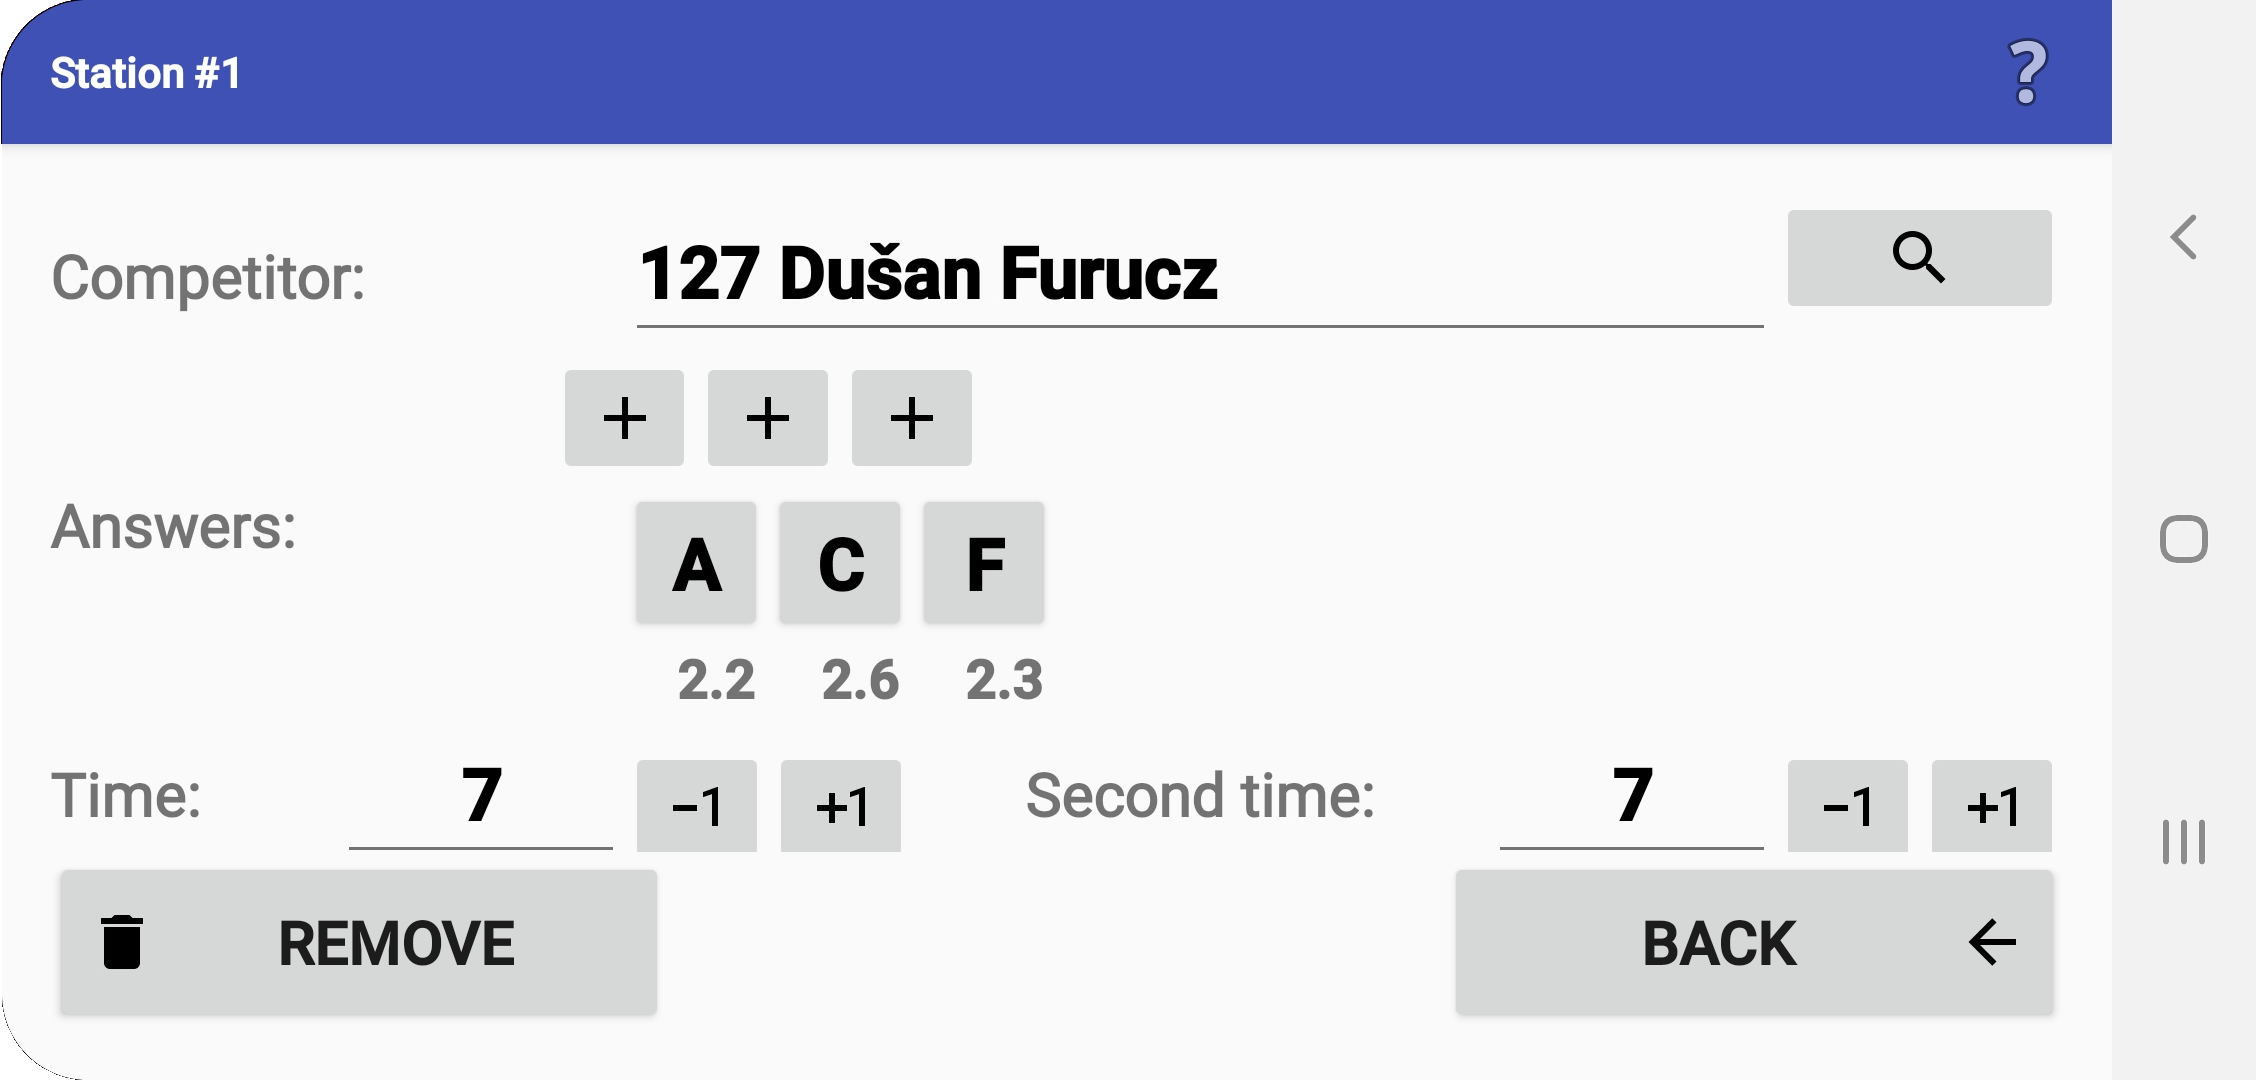
- If you chose a wrong competitor before starting,
you can change the name manually,
or select the correct one from the startlist using the magnifier icon
(after finishing the selection, you can return
to edit mode via the icon with a "tick").
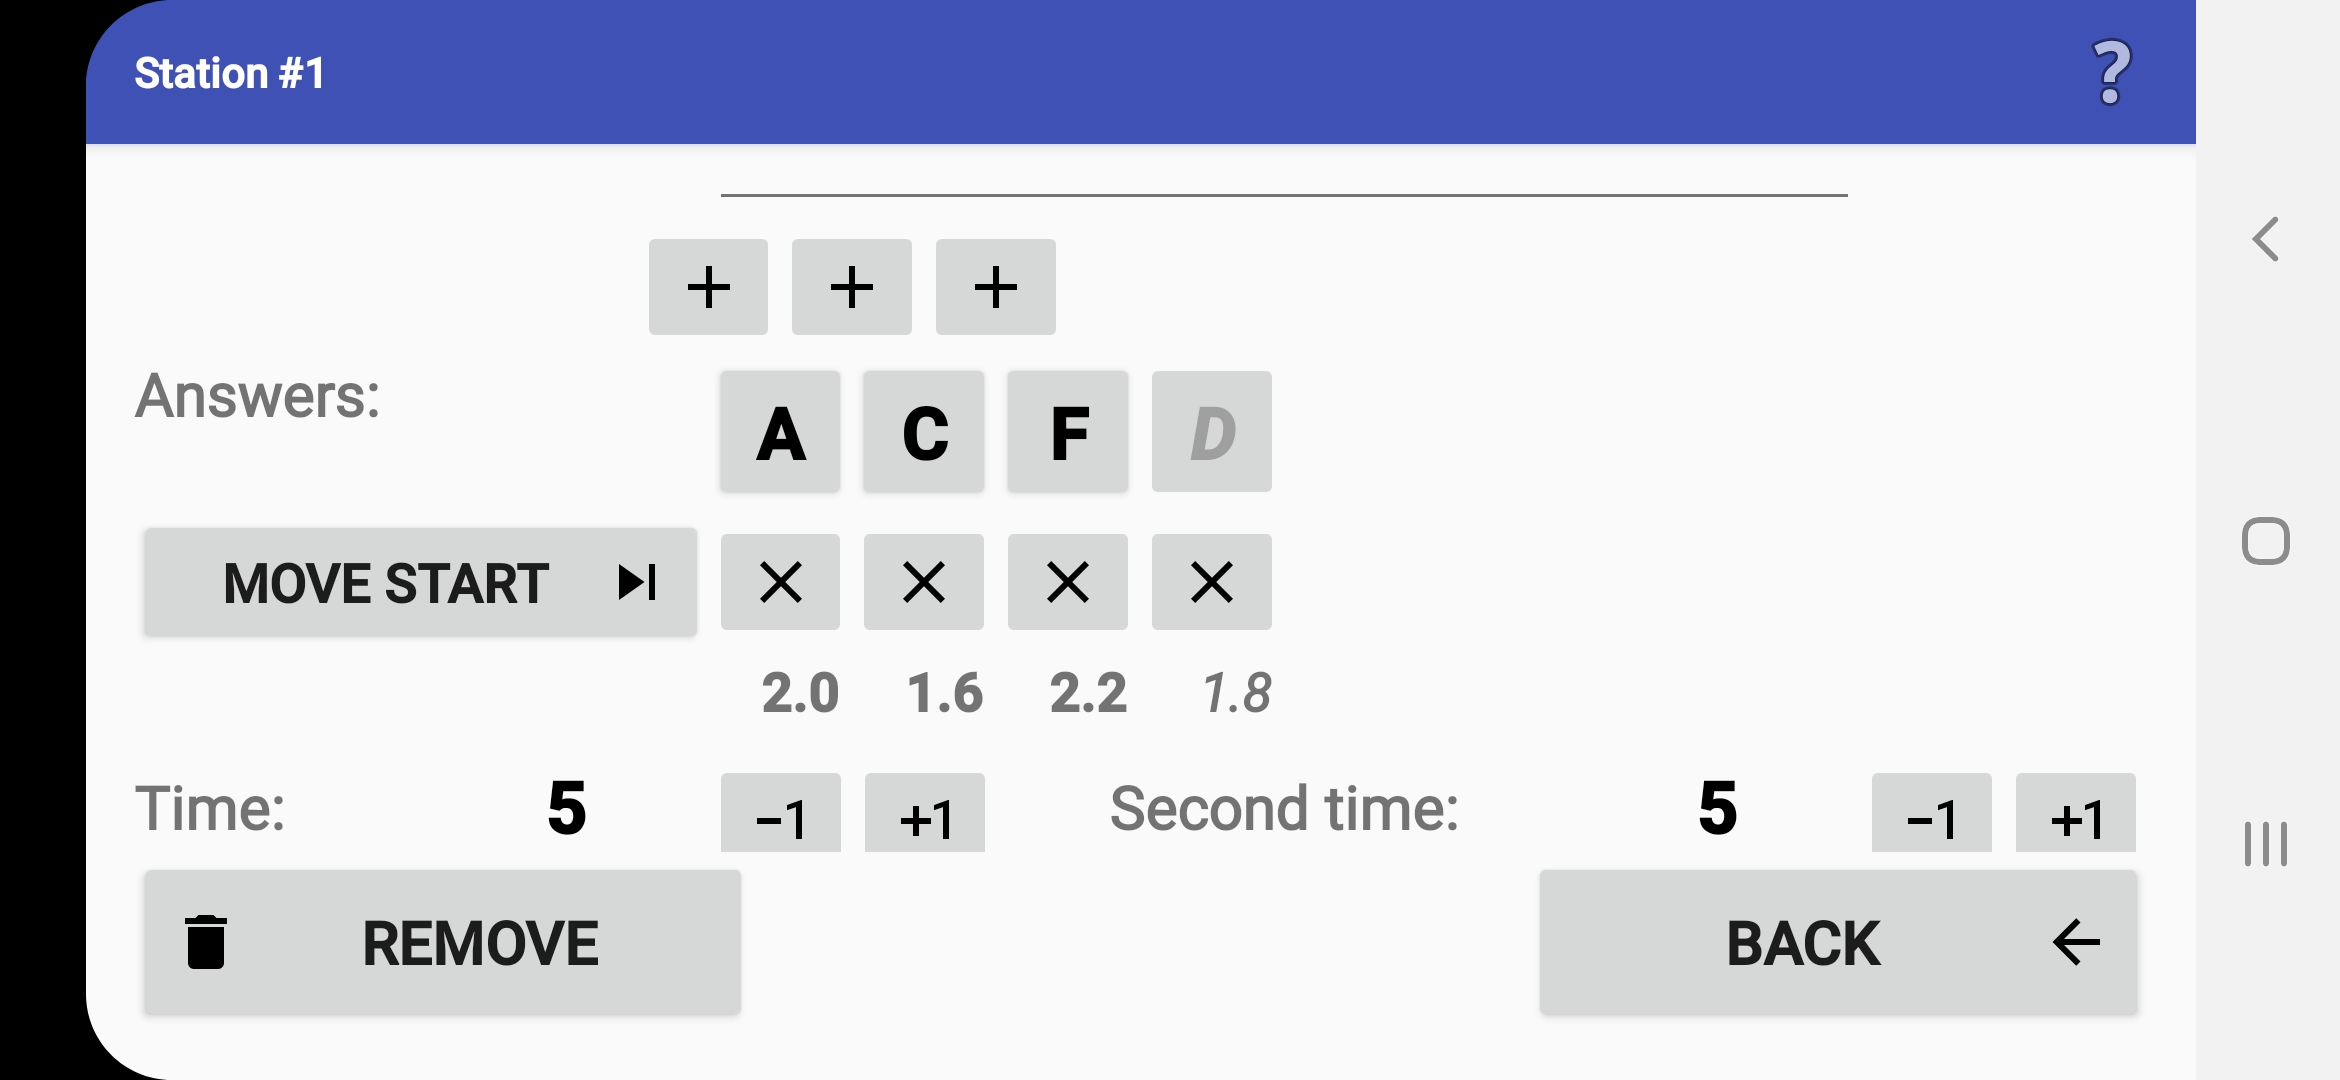
- You can insert an unrecorded answer
(by clicking a button with the "+" symbol).
A typical usage is
when the competitor turns over two maps at a time.
- You can change any answer
by clicking the answer button.
- You can remove an answer clicked by mistake,
and the application will let you keep the original time
or use the later one.
- Respond Yes, if you pressed the wrong button
right when a competitor was answering,
and you corrected the answer afterward.
- Respond No, if you pressed a button by mistake,
although the competitor did not answer.
- Respond Yes, if you pressed the wrong button
right when a competitor was answering,
and you corrected the answer afterward.
- In front of the buttons for deleting answers
is a button to move the start.
This is used if you accidentally started the stopwatch earlier
and pressed an out-of-order answer (X) at the moment of actual start.
The button deletes the entire section
from the early start to the actual start.
- Using the +1/-1 buttons,
you can adjust the total time by 1 second.
- It is recommended to note changes
in the Comment field.
- If an audio recording
of the competitor's responses was made,
it can be played back by pressing the Replay button.
- All changes can be revoked
using the Restore button.
- The entire record can also be permanently deleted
using the Remove button.
- The only way to exit this dialog after making some changes is to press the Save button.
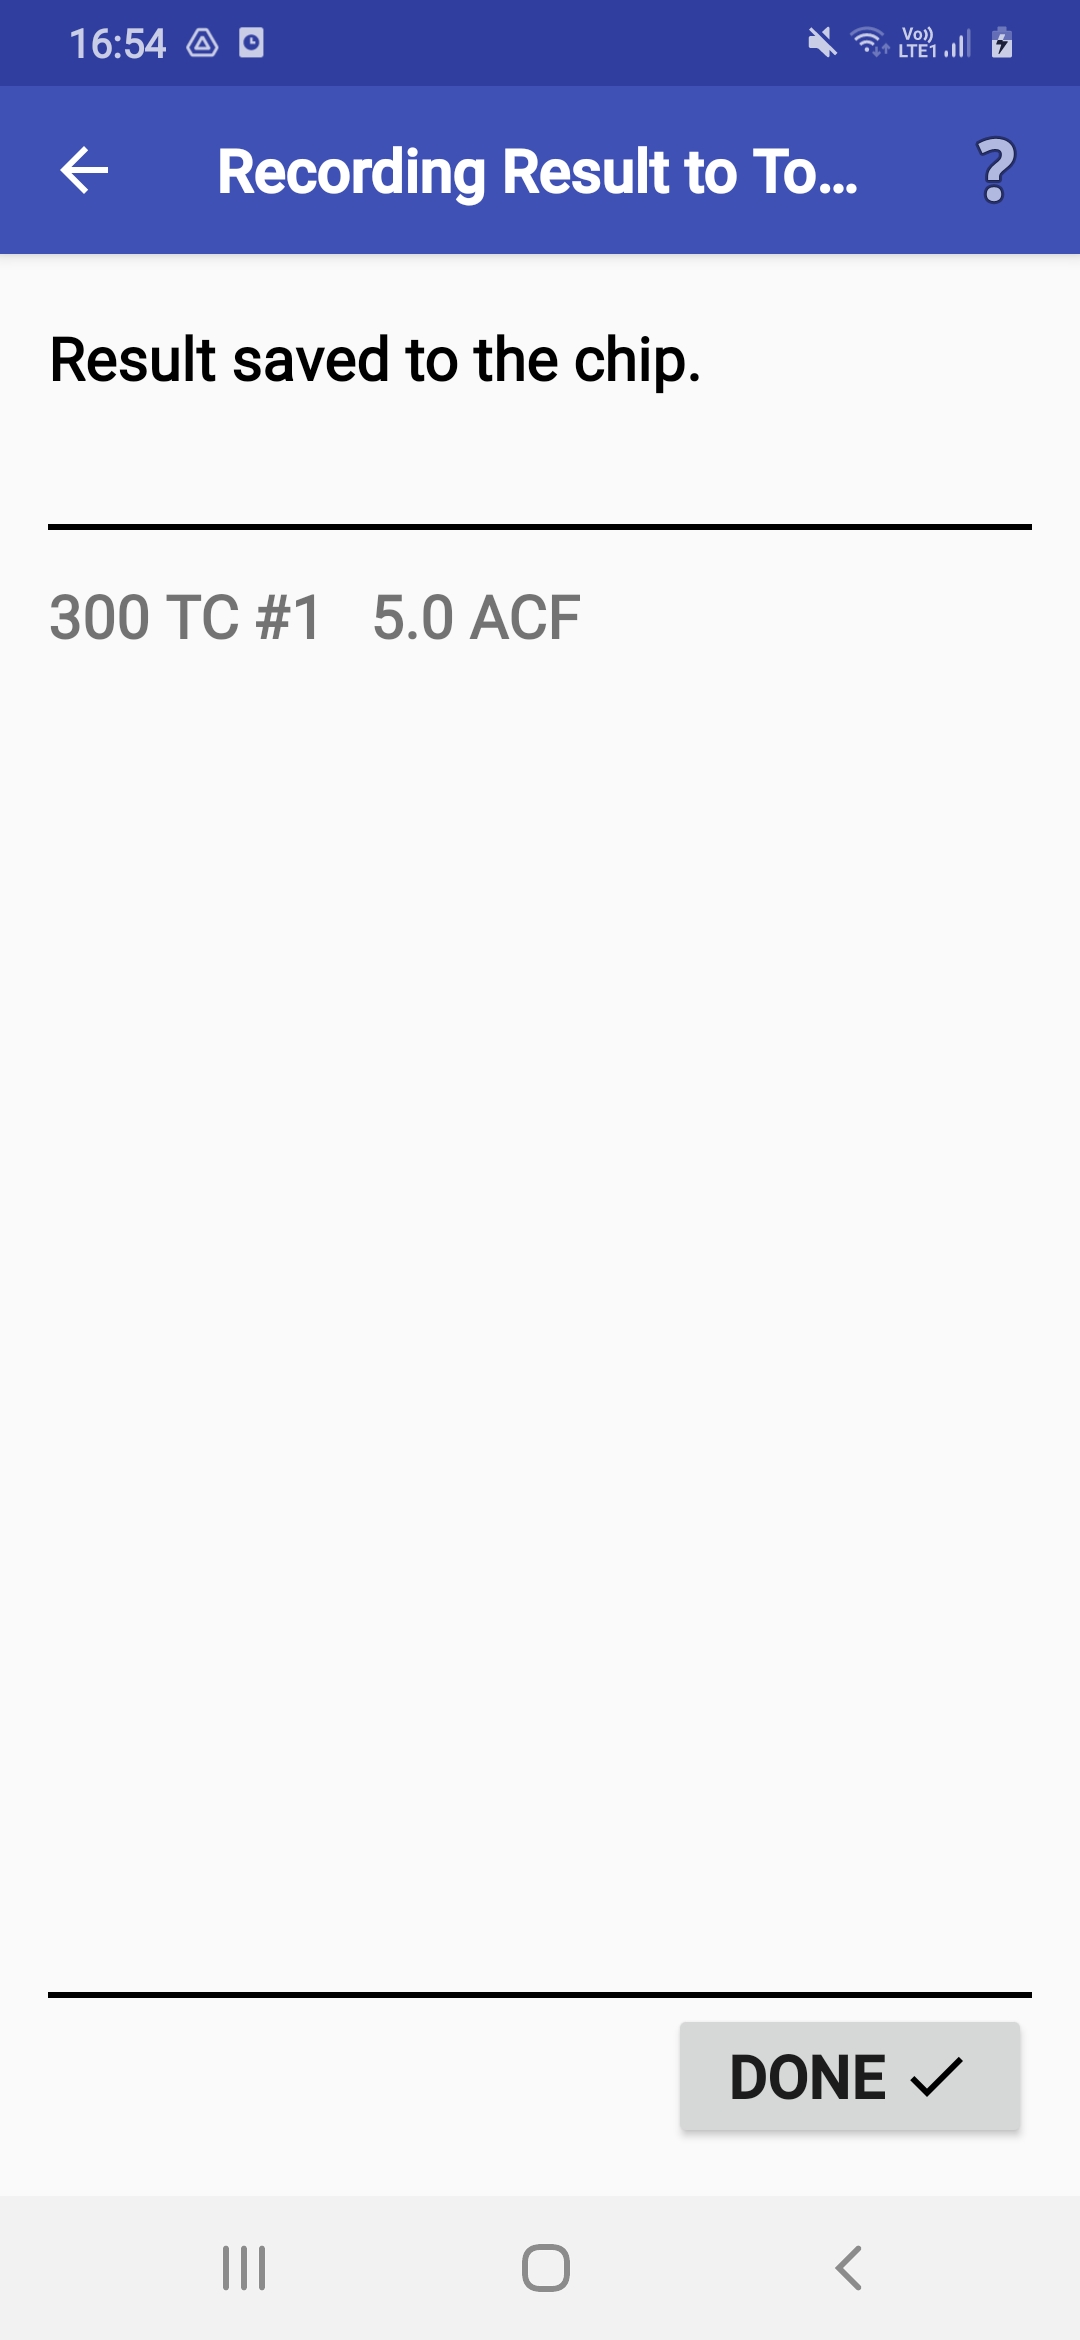
Recording Result to Toe Chips
- The organizer can decide to store timed control results
to competitors' ToePunch system chips
so that they can be read out and processed
together with the data from the course.
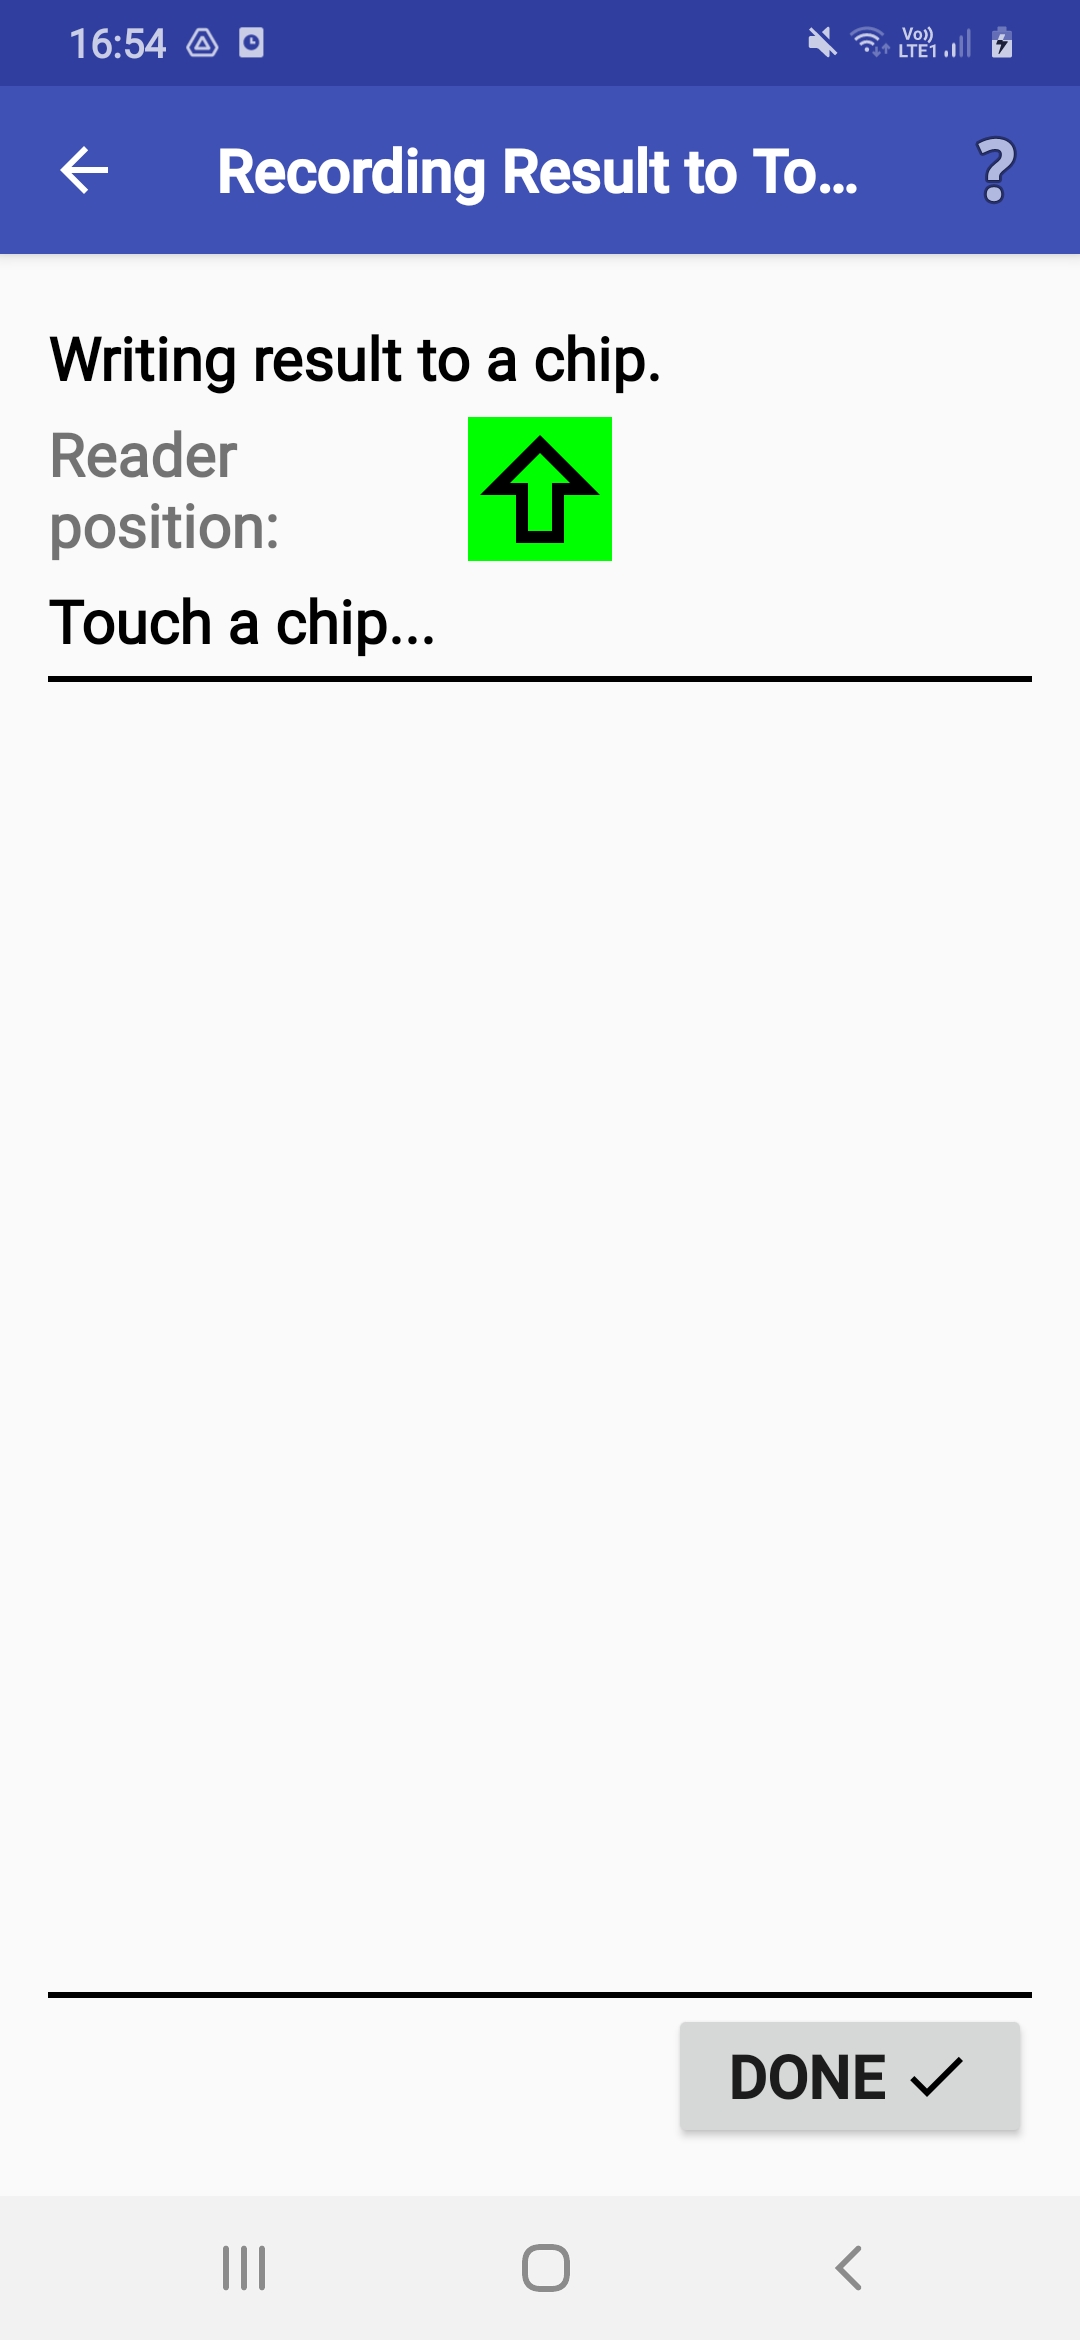
- In this case,
immediately after saving the data to the internal file,
the marshal should touch
the competitor's Start/Finish/Info chip to the mobile
so ANT will save the competitor's answers and time to the chip.
- If the operation fails, the marshal can touch the chip again or continue without saving the data to the chip.
Punching on a mobile card
- In mobile card mode
(competitors carry the phone/tablet),
you identify yourself before the start
(see Selecting Competitors chapter),
then you select the (part of a) course to compete in
(if there is just a single part, this step is skipped),
and then a screen with a start (triangle) button appears.
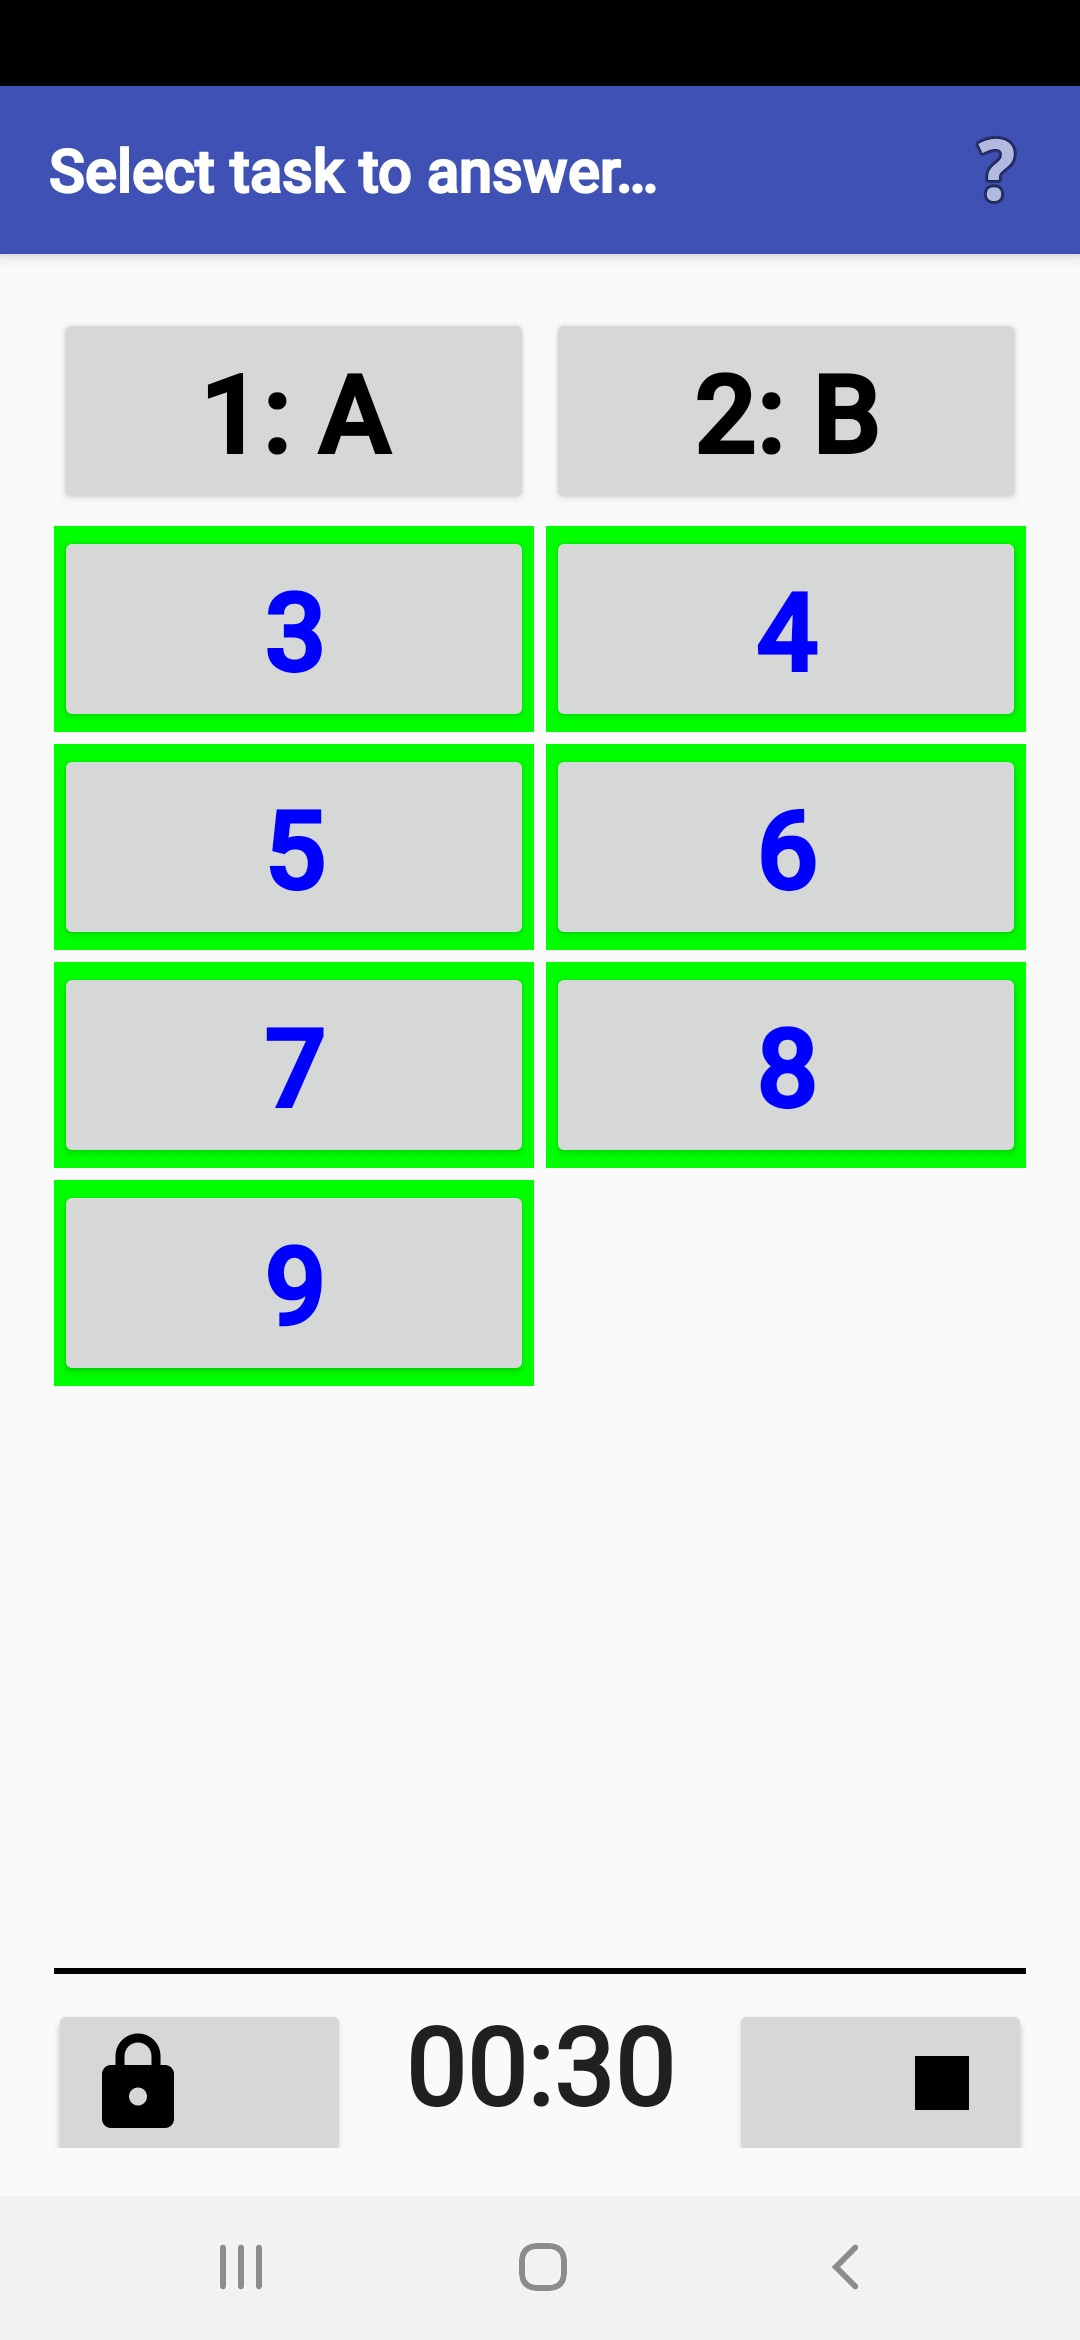
- After starting the timer,
you see buttons for all tasks in the selected (part of the) course.
- To initiate punching an answer, first click
the button with the corresponding task number.
Then, all possible answer buttons appear,
and you can select one by clicking on it.
- After punching an answer,
it is shown on the corresponding task button.
If the organizer permits it,
you can later change the answer by clicking it again.
- To prevent accidental unwanted punches,
you can press the Back key or Lock button
between individual punches.
The application becomes hidden, and you can recall it later.
- After completing all tasks,
you stop the timer by clicking on the stop (black square) button.
WARNING! Stopping the timer must be approved
by clicking a special button within 5 seconds.
- There are other methods for preventing unintentional screen touches. You can activate them in the Preferences menu (see Setting Preferences chapter).
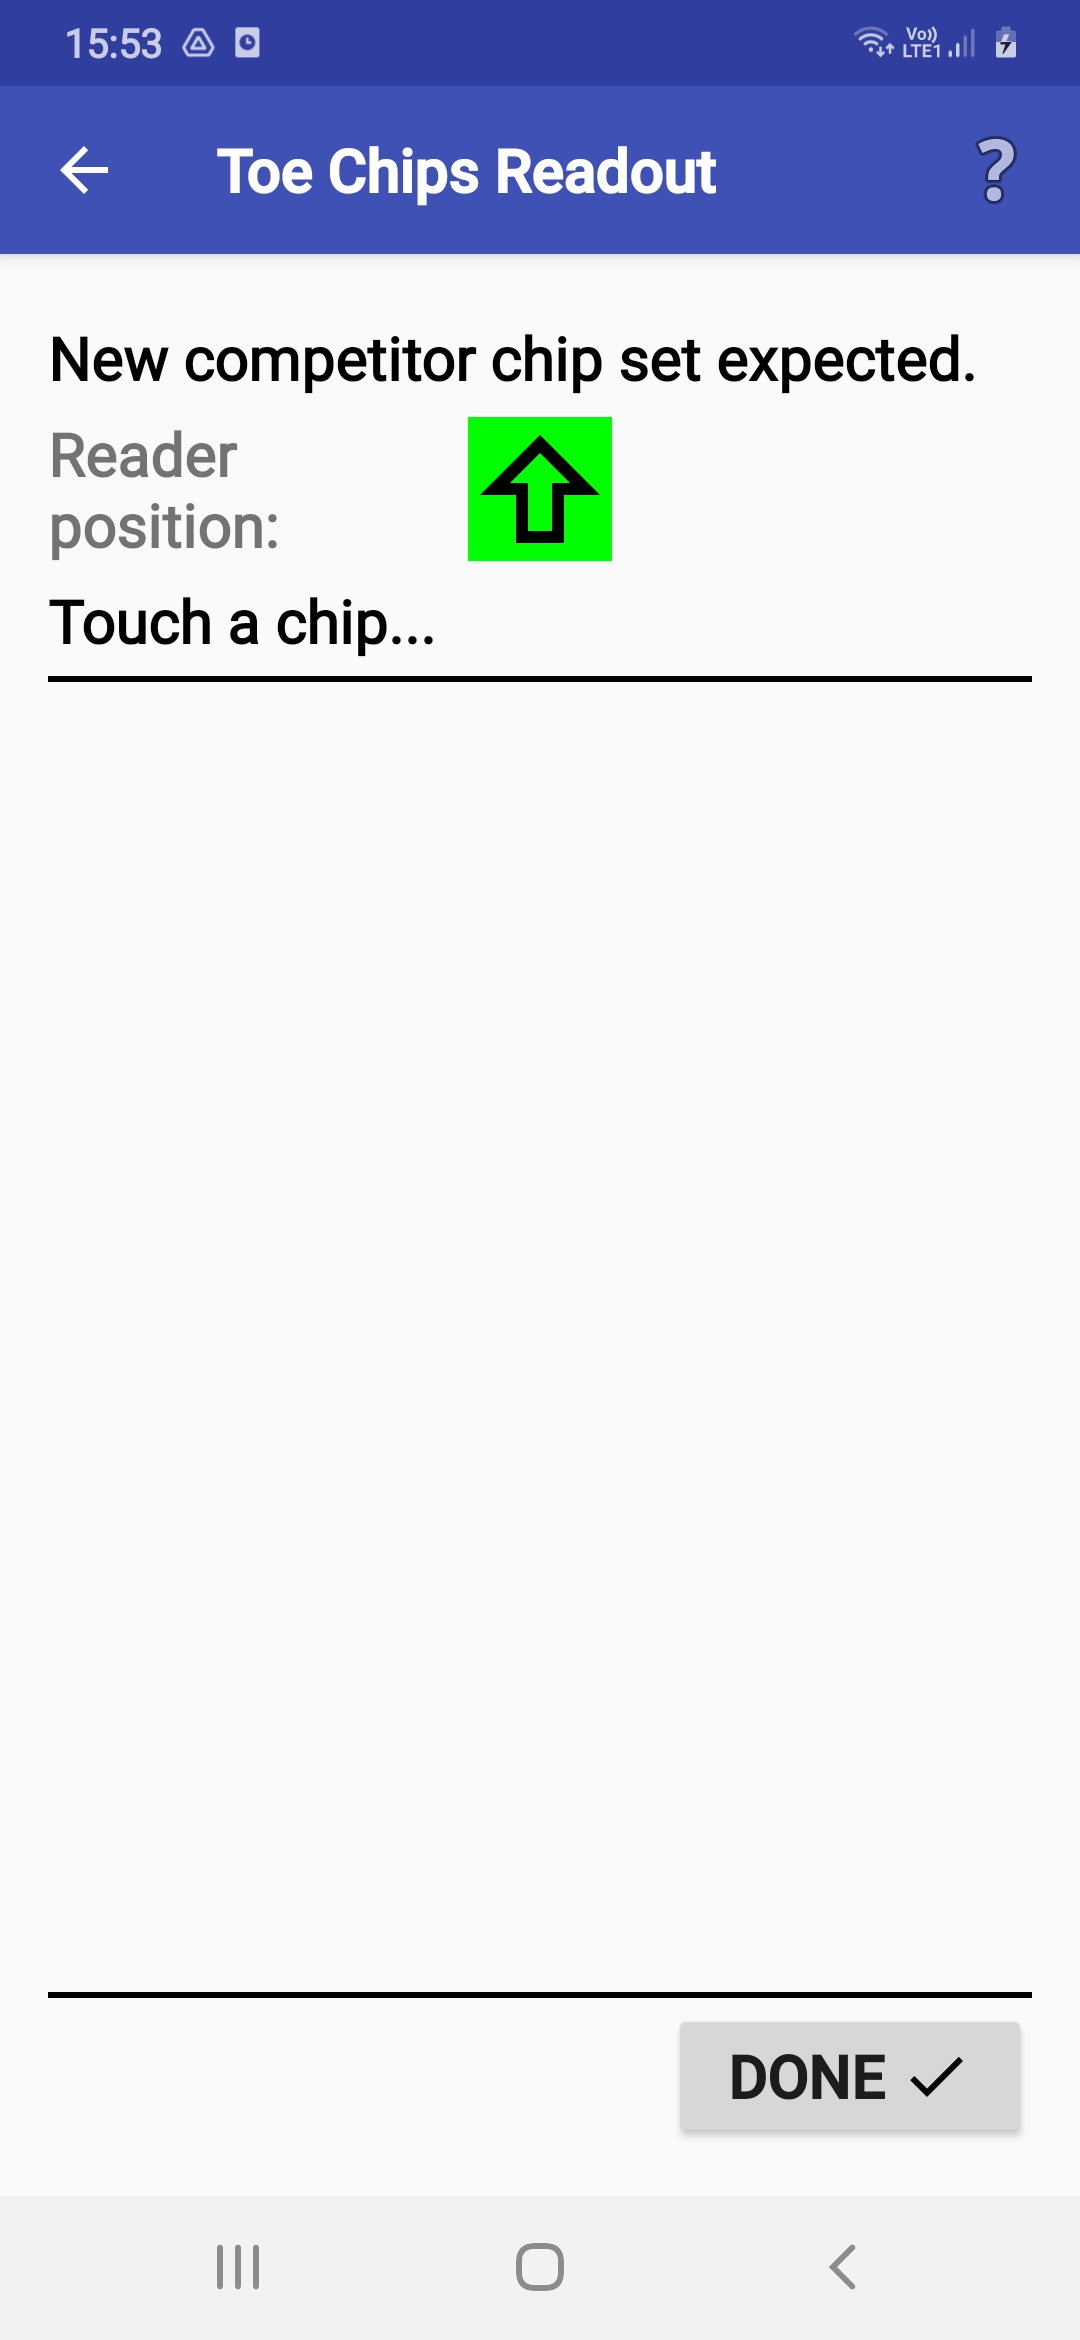
Toe Chips Readout
- ANT can be used as a ToePunch system read-out point
operated by a marshal (or a competitor).
- If ANT knows your mobile/tablet type,
a green marker on the screen indicates the NFC reader's position.
It is placed either approximately in the middle of the device,
or at the edge or corner in the arrow direction.
The chip must be placed on the device's reverse side.
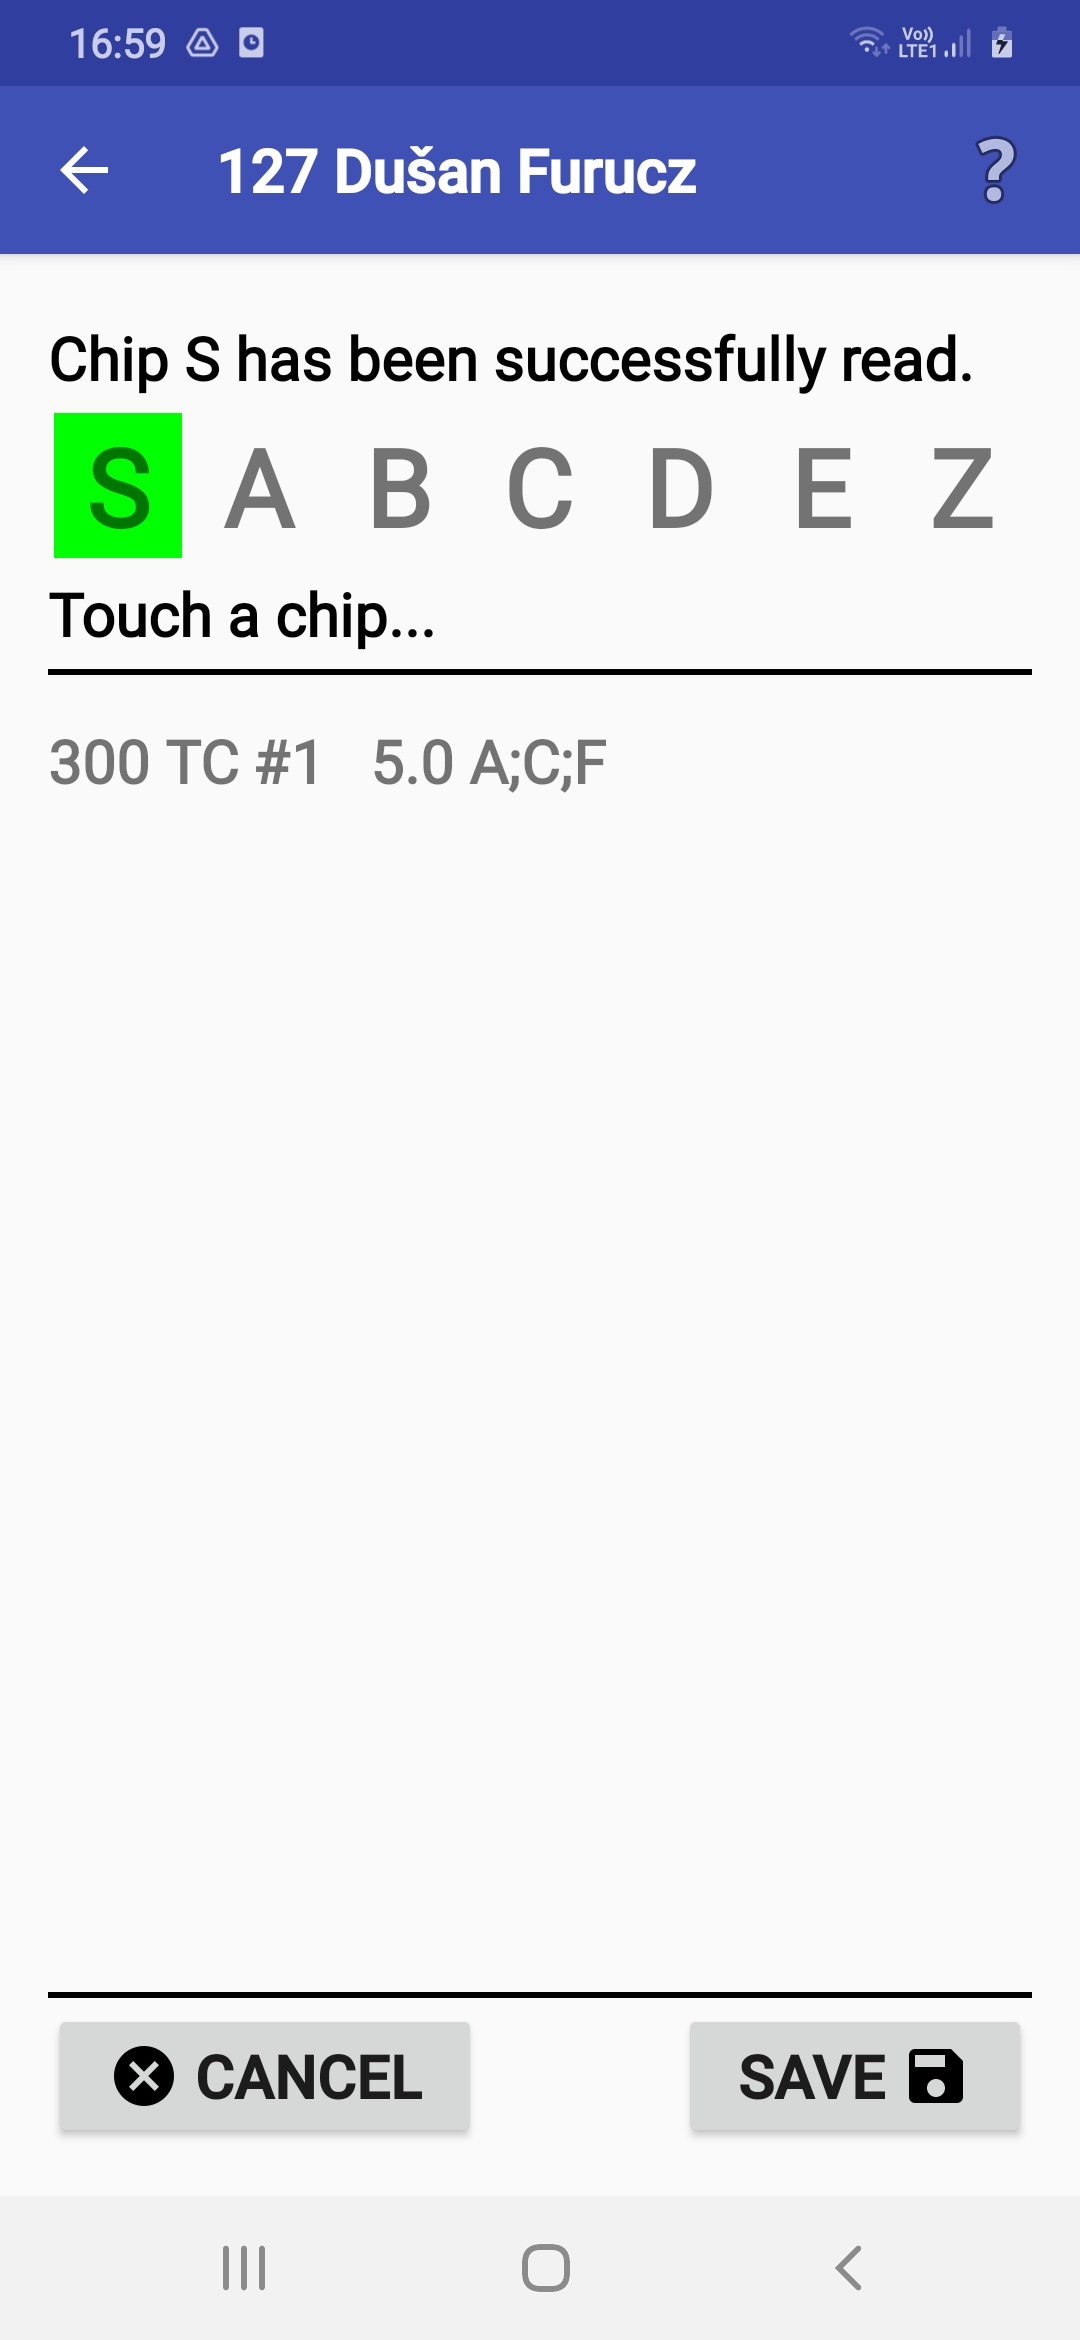
- The chips can be read in any order.
When it reads the first chip,
ANT tries to find the chip number in the startlist.
If it is not found, the number can be newly assigned to a competitor.
- After reading all chips, the competitor's result
can be stored in a result file.
This file is listed with an identifier "TR0".
- In case of any problem,
reading a chipset can be retried.
- The read-out result file can be processed in the Results screen, and preliminary results can be calculated from it.
Clearing Toe Chips
- ANT can be used as a ToePunch system
chipsets clearing unit.
This operation is among Special actions in the menu.
- If ANT knows your mobile/tablet type,
a green marker on the screen indicates the NFC reader's position.
It is placed either approximately in the middle of the device,
or at the edge or corner in the arrow direction.
The chip must be placed on the device's reverse side.
- The chips can be cleared in any order, but all of them have to be cleared. If you try to stop before all chips in the set have been cleared, ANT will warn you.
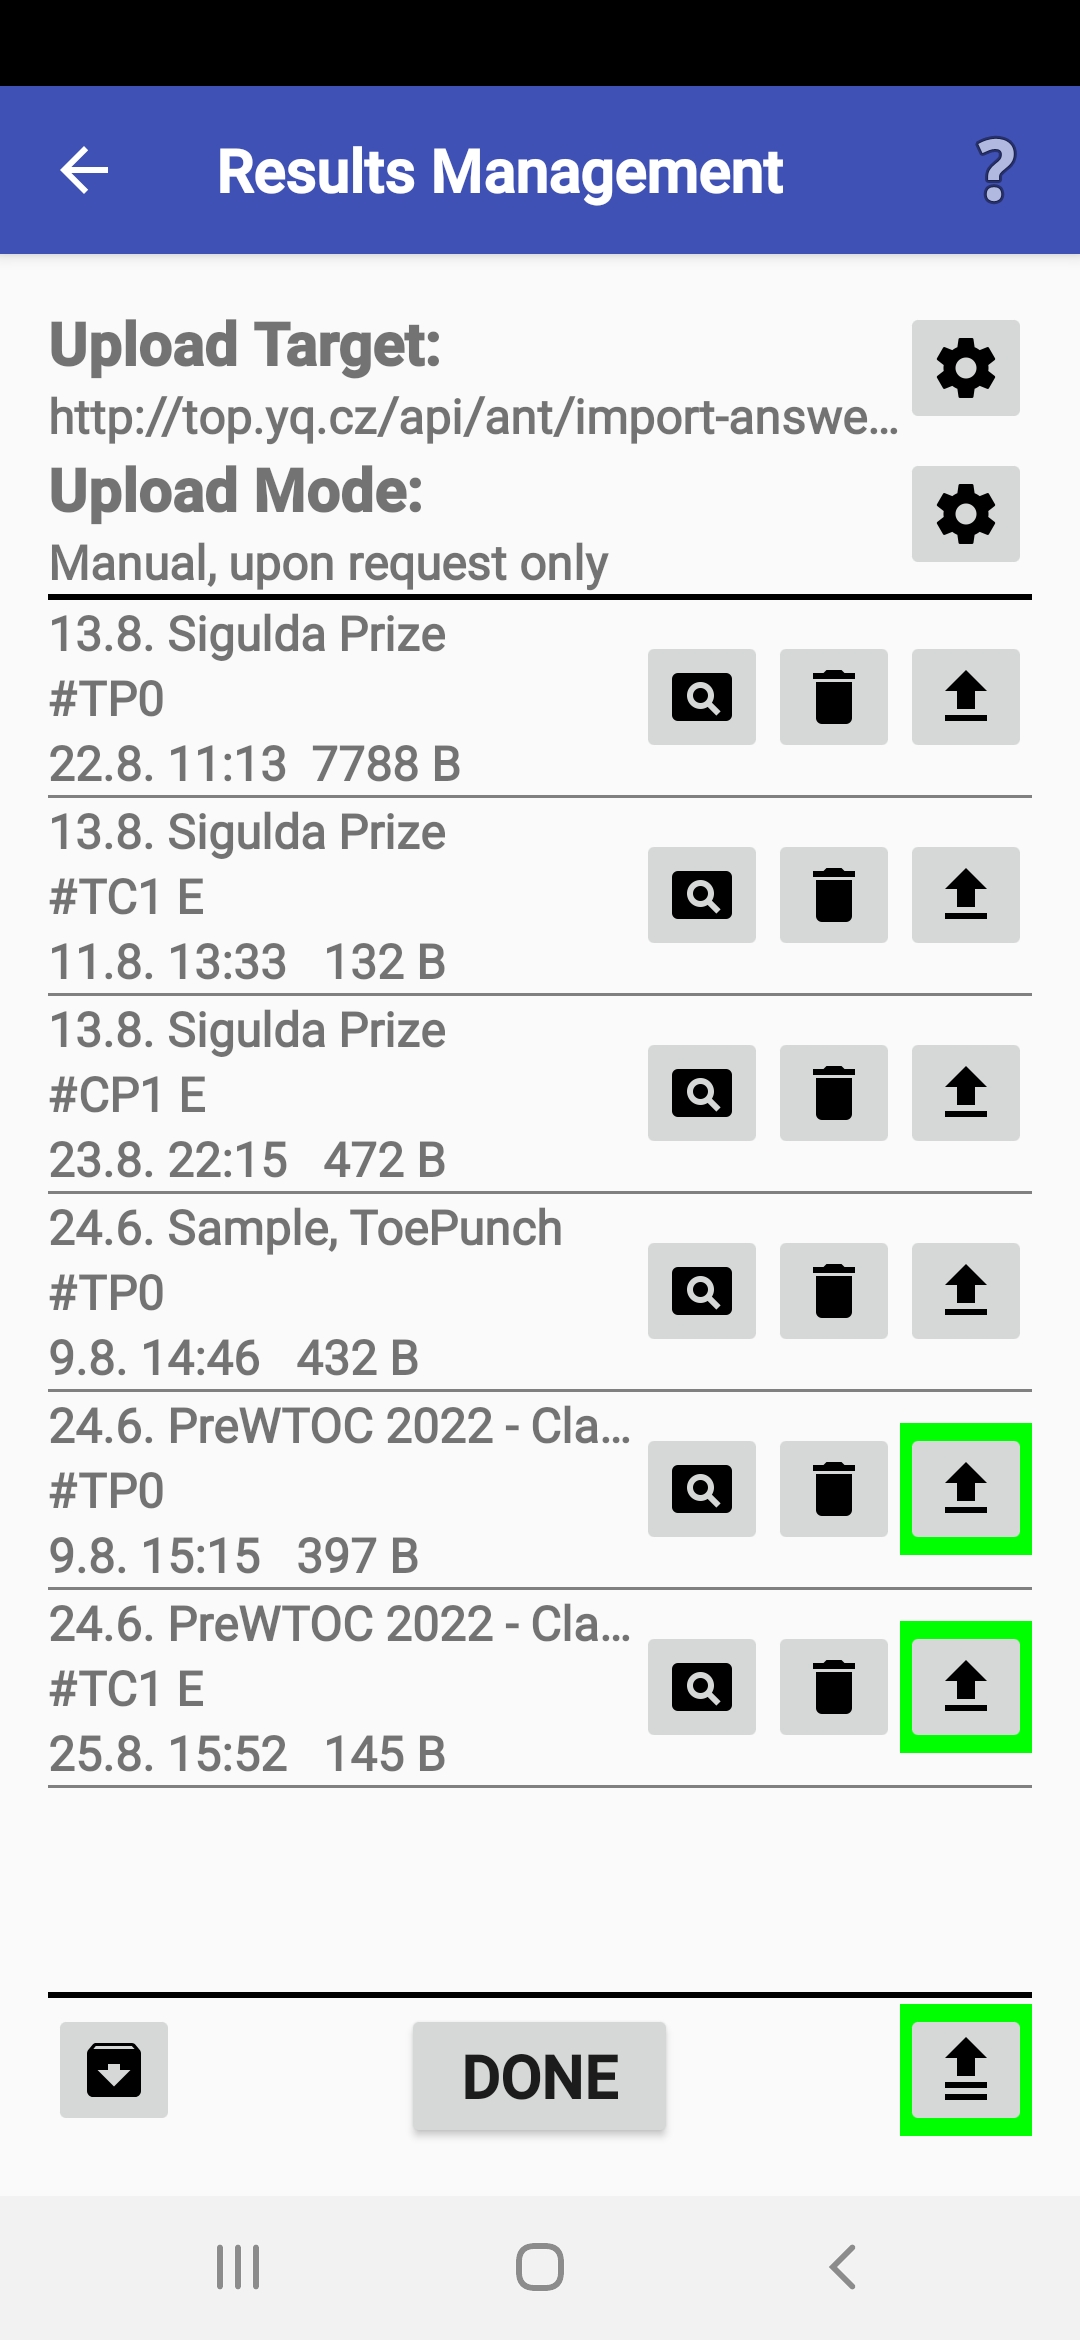
Results Management
- The Results page shows all the result files
saved in the phone/tablet's internal storage.
You can review, remove, and upload them.
- Reviewing the result file can be helpful when
you need to check some previously recorded result.
The essential data follows the competitor name
on each line of the result file.
- The total time is in the 2nd field
after the name.
- The answers start in the 4th field
after the name.
- The complete result record format
is described on page ant.yq.cz.
- The total time is in the 2nd field
after the name.
- For uploading results,
you have three possibilities:
- Uploading to a web server
(it might be secured by a password
that you must enter in the upload configuration dialog).
- Transferring to a device
connected via Bluetooth.
- Uploading (e.g., to a PC) over USB.
- Uploading to a web server
(it might be secured by a password
that you must enter in the upload configuration dialog).
- If a file contains results
that have not yet been uploaded,
the corresponding button has a green border.
- All result files that have not yet been uploaded
can be sent to the server
using the button in the bottom-right corner
(with the double-arrow icon).
- If your device contains result files from punching stations
(either ANT ones or the ToePunch system ones),
you can merge them into a single result file
by clicking an icon in the bottom left corner.
This action includes calculating
preliminary results and writing them to an HTML file.
This file is stored in the 'pub' subdirectory and
can be published by an HTTP server
started locally on the smartphone.
- If you have accidentally misconfigured
a station number, you can change the station number in the existing result file
by clicking the station number on the file line.
- WARNING! Uninstalling the application will remove all these files!
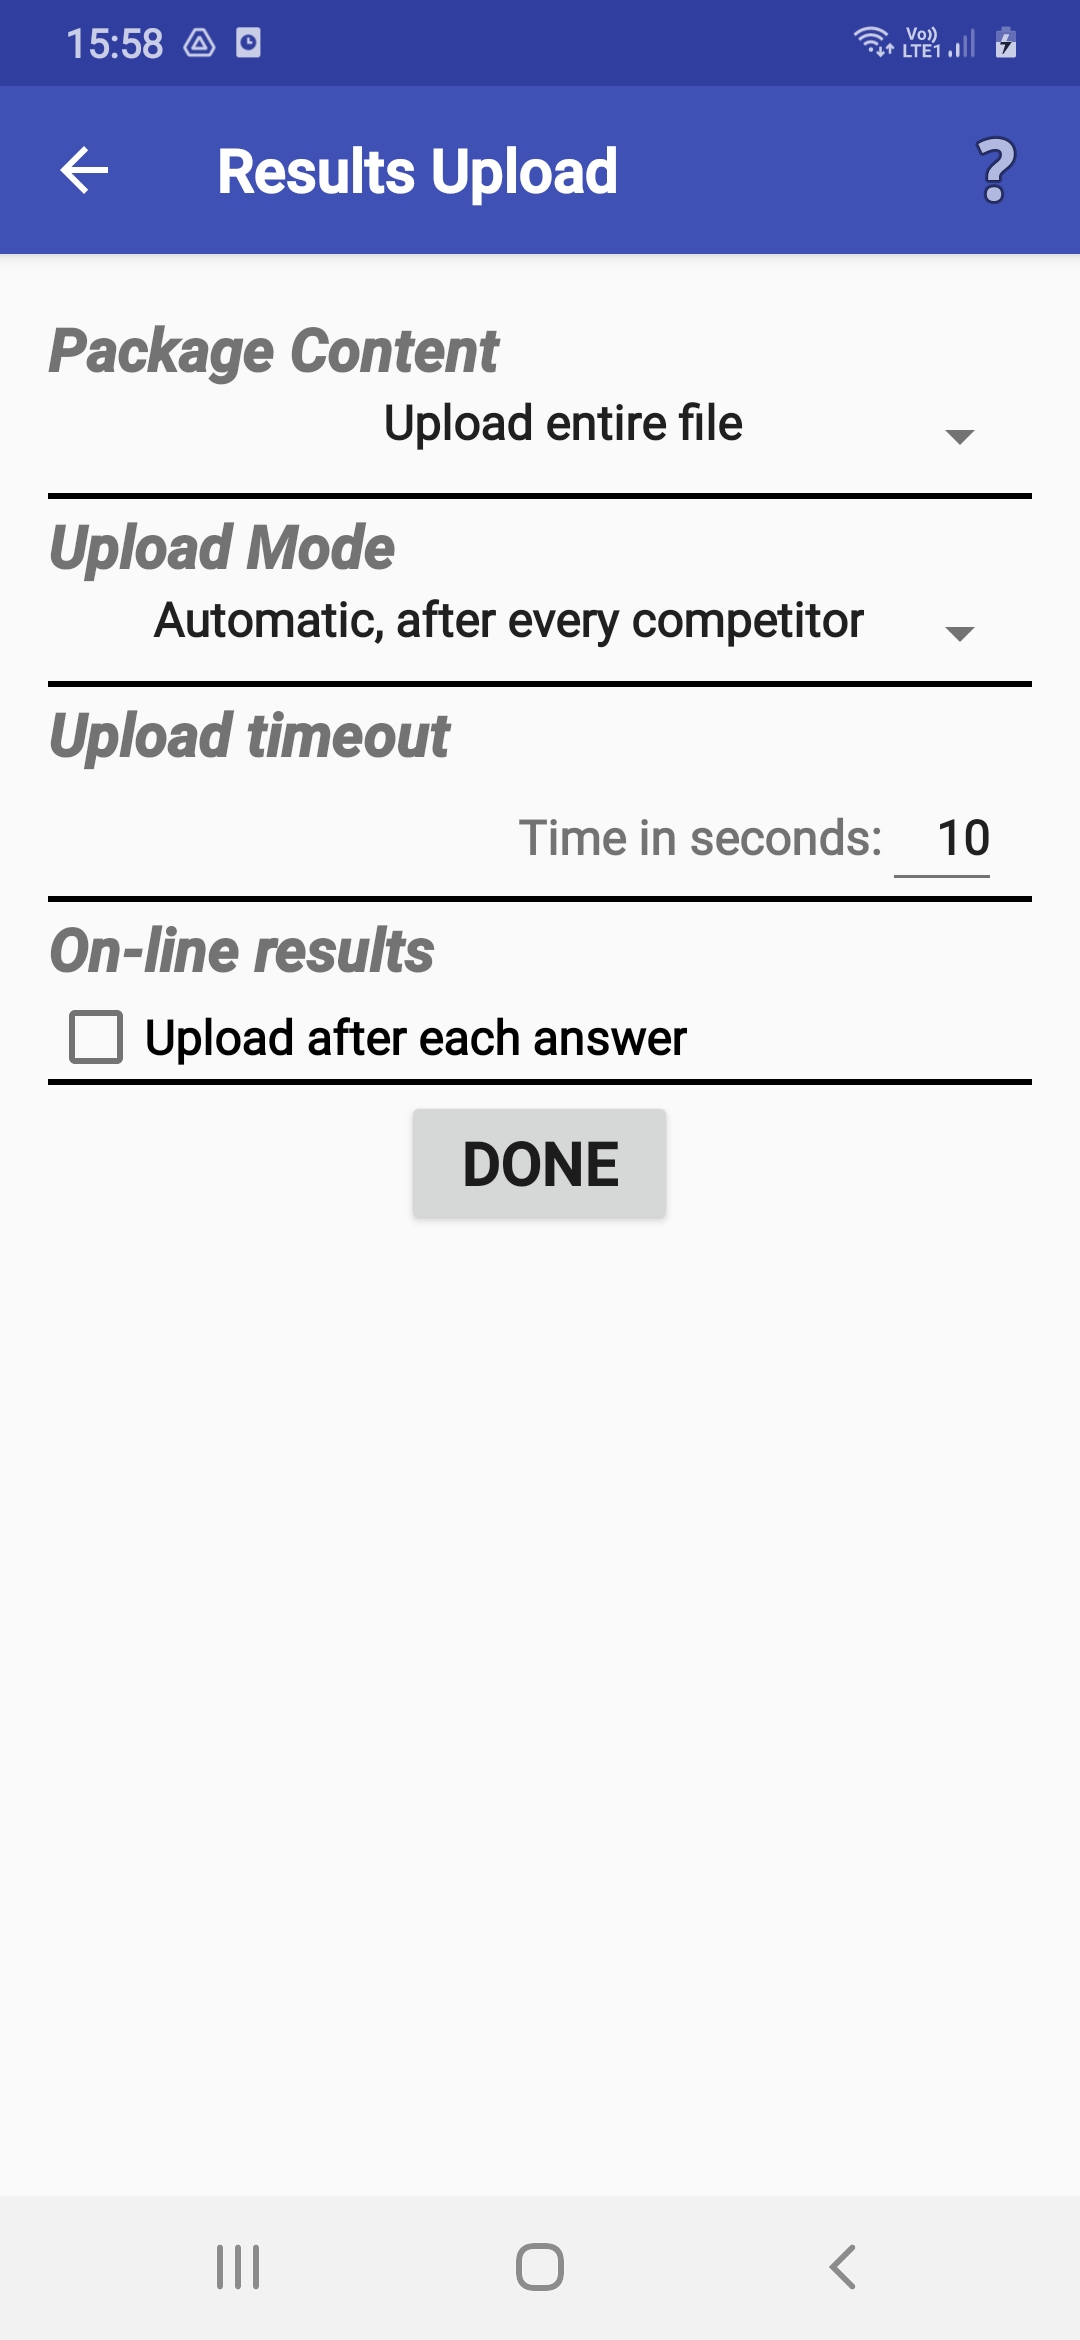
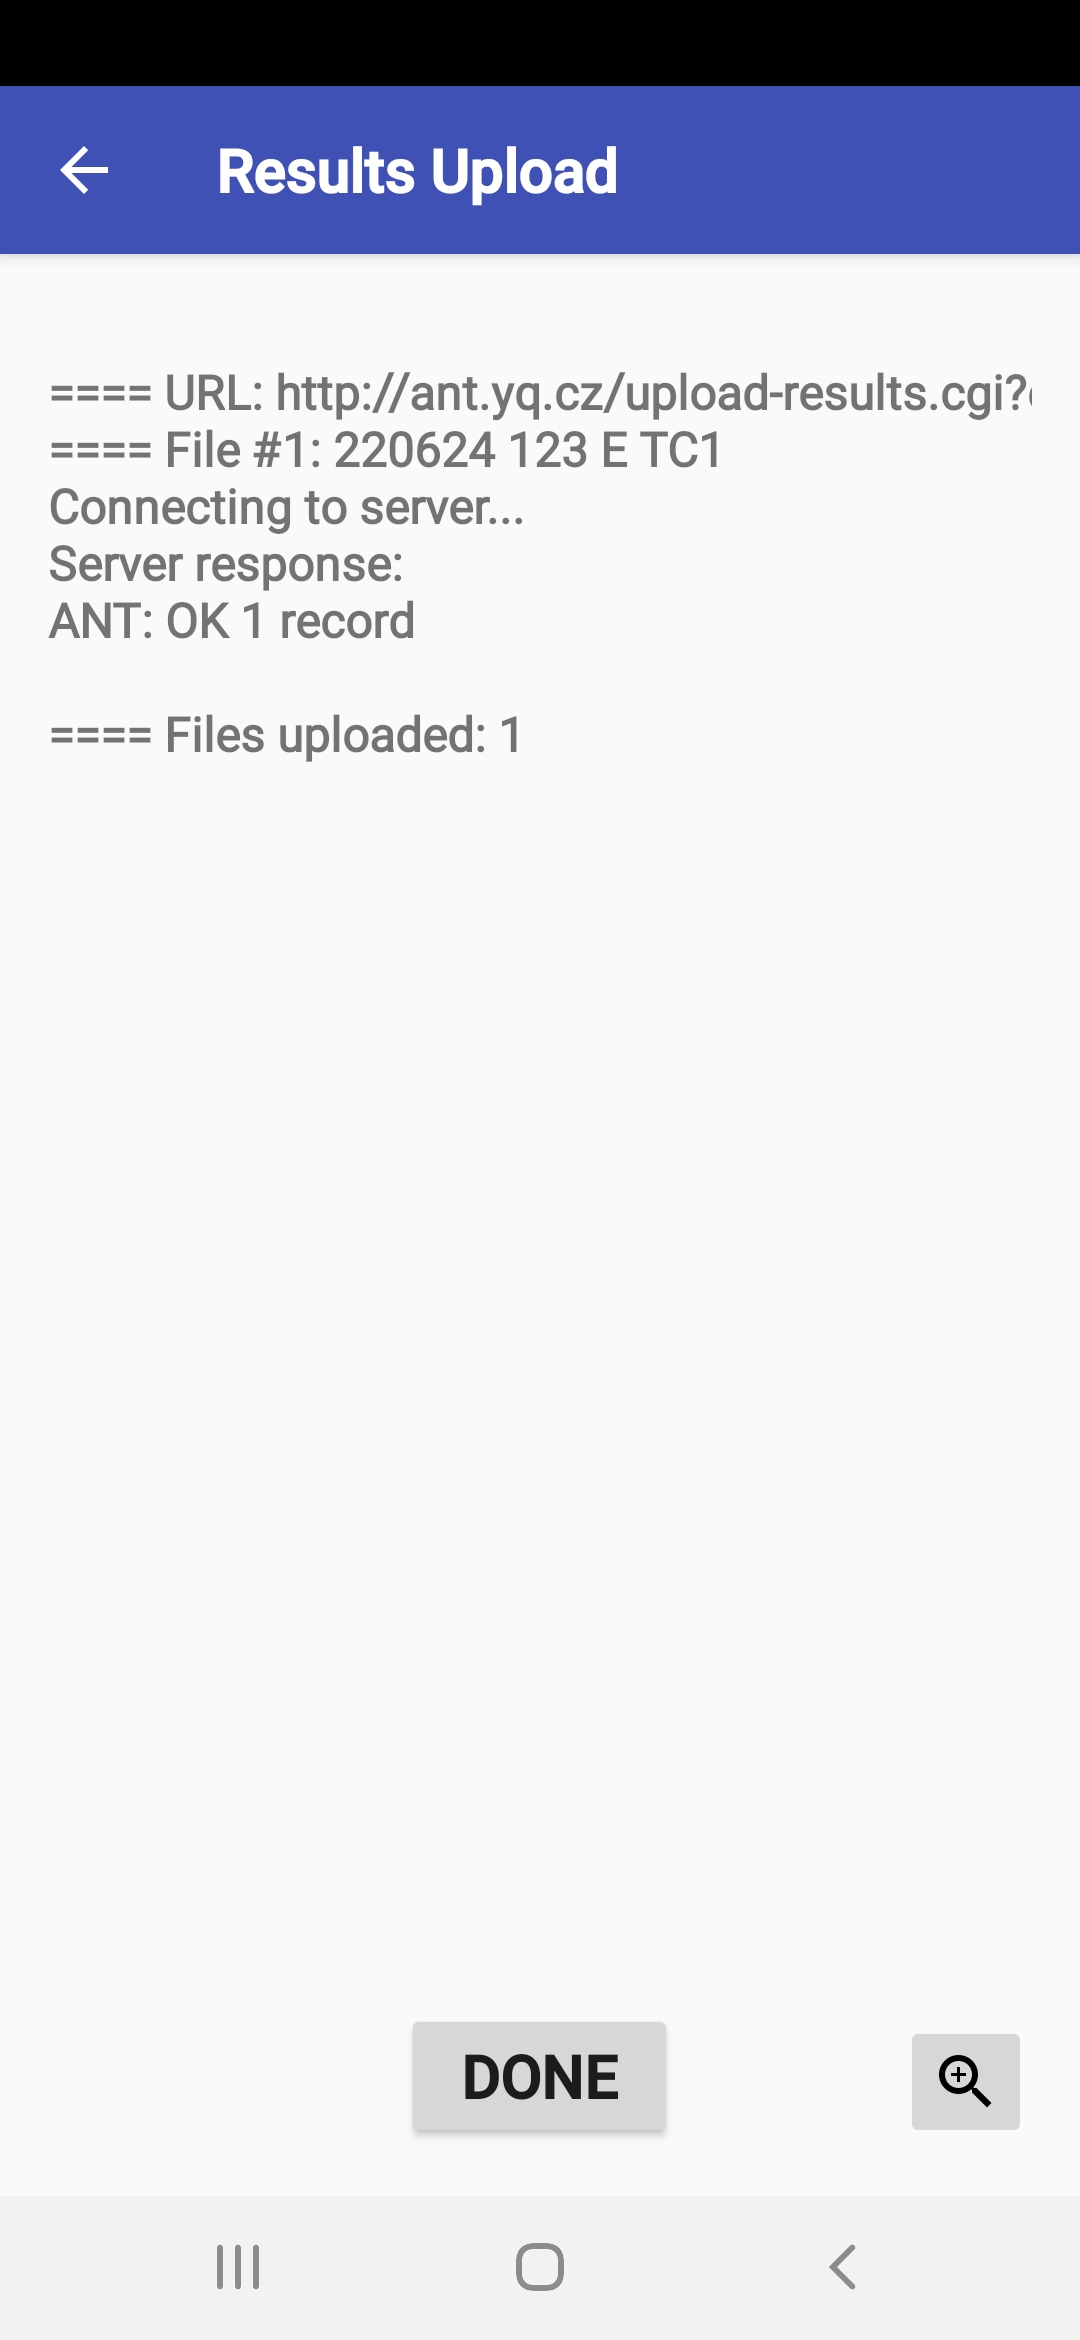
Results Upload
- The application has several modes for uploading results;
you can switch among them
according to your needs and connection quality:
- Manual - The marshal can start an upload manually
by clicking the upload button
on a line on the Results screen.
- Automatic -
The upload starts after each competitor's result is saved.
- Batch - The upload starts automatically
after every few competitors
(you can specify the number of competitors by yourself).
When the specified number is reached,
the application will ask for your permission
to make an upload attempt.
- Manual - The marshal can start an upload manually
by clicking the upload button
on a line on the Results screen.
- In automatic and batch mode, you can specify a timeout
to prevent an excessively long wait
in the event of network problems.
- If the automatic or batch transfer fails,
the application offers to open this dialog,
where you can change the parameters of future uploads.
- The organizer usually defines
the Package Content option.
It controls whether every transfer contains the entire result file
or just the records saved after the last successful transfer.
- If the organizer wants,
sending to the server after each answer can be configured.
However, this option must be supported by the target result server.
- You must confirm your changes by pressing the Done button.
ANT Master Server
- The ANT Master Server item in the Special actions menu
enables a mode in which the application acts as an HTTP server,
allowing the configuration to be downloaded to
and results uploaded from other ANT devices.
- This mode is used when
signal coverage is poor in the competition area,
and mobile phones cannot communicate directly
with the result server.
A Wi-Fi hotspot will be set up on the device with AMS,
and this network will be configured on other devices
to connect to AMS.
They also must set the IP address of the AMS device
as their upload target server.
When the AMS device is close enough,
the slave device can download the configuration
or send the results.
- Before starting the server,
you can adjust the configuration sent to the clients.
Specifically, you can set whether they will send the results
back to the mobile with AMS or
to the same server as the device with AMS.
- After starting, the server begins accepting result files
and counting the number of received records.
At a suitable moment, you can stop the server,
and if automatic uploading to the final server is enabled,
ANT will try to send all new results.
- ANT Master Server can also receive and collect data from ToePunch system units.
Problem reporting
- If you encounter any problematic behavior in the app,
we would appreciate it
if you could save the application log as soon as possible
and then send it to us with your comments.
You can start the log management module
from the menu using the Problem reporting item.
- The Save log button saves
a copy of the current system log
to a new file for later delivery to developers
and lets you add a comment directly.
- For uploading logs, you have three possibilities:
- Uploading to a web server (ant.yq.cz).
- Transferring to a device connected
via Bluetooth.
- Uploading (e.g., to a PC) over USB.
- Uploading to a web server (ant.yq.cz).
- WARNING! Uninstalling the application will remove all log files!